Backpacking Coyote Gulch

We did a point to point trip. We entered through the sneaker route and exited through crack in the wall. Most people do this in the opposite direction due to the huge sandy climb out of crack in the wall. We parked both cars at the Jacob Hamblin TH (tanks/sneaker). When we reached the Forty Mile Ridge TH after climbing out of crack in the wall a few days later two of us ran the 2.5 miles on a very sandy road to retrieve cars. You do need 4 wheel drive to make it between the two trailheads due to how sandy it is. We did see a lot of backpackers walking between the two trailheads because of this.

First Sandy Section Of Trail

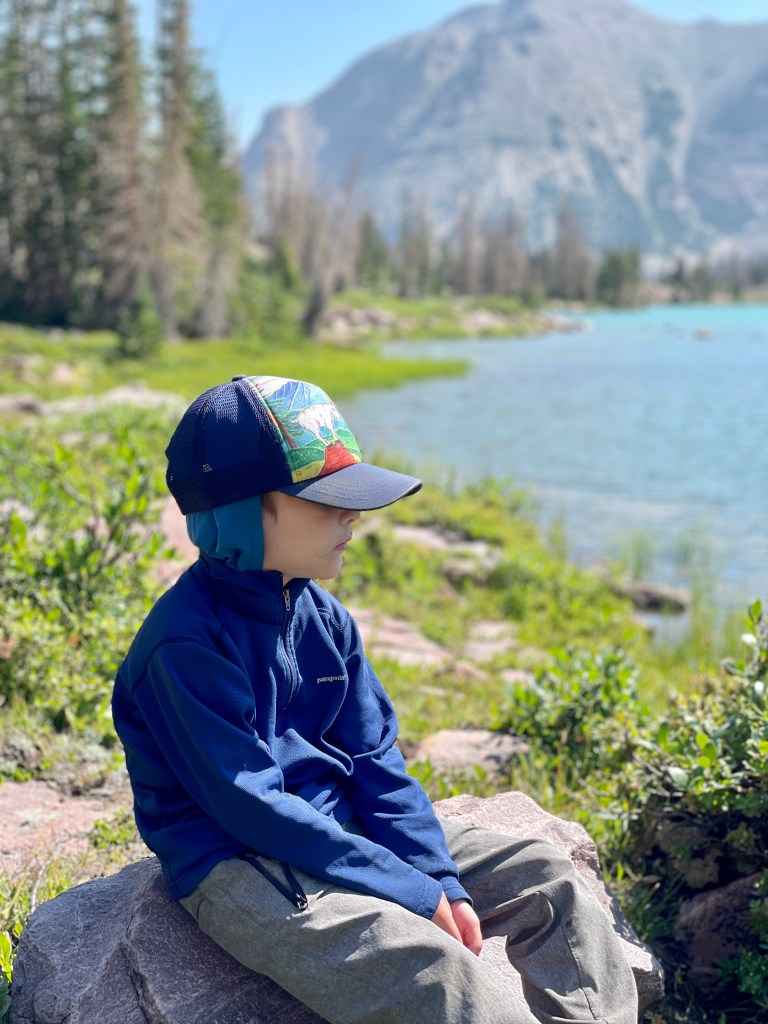
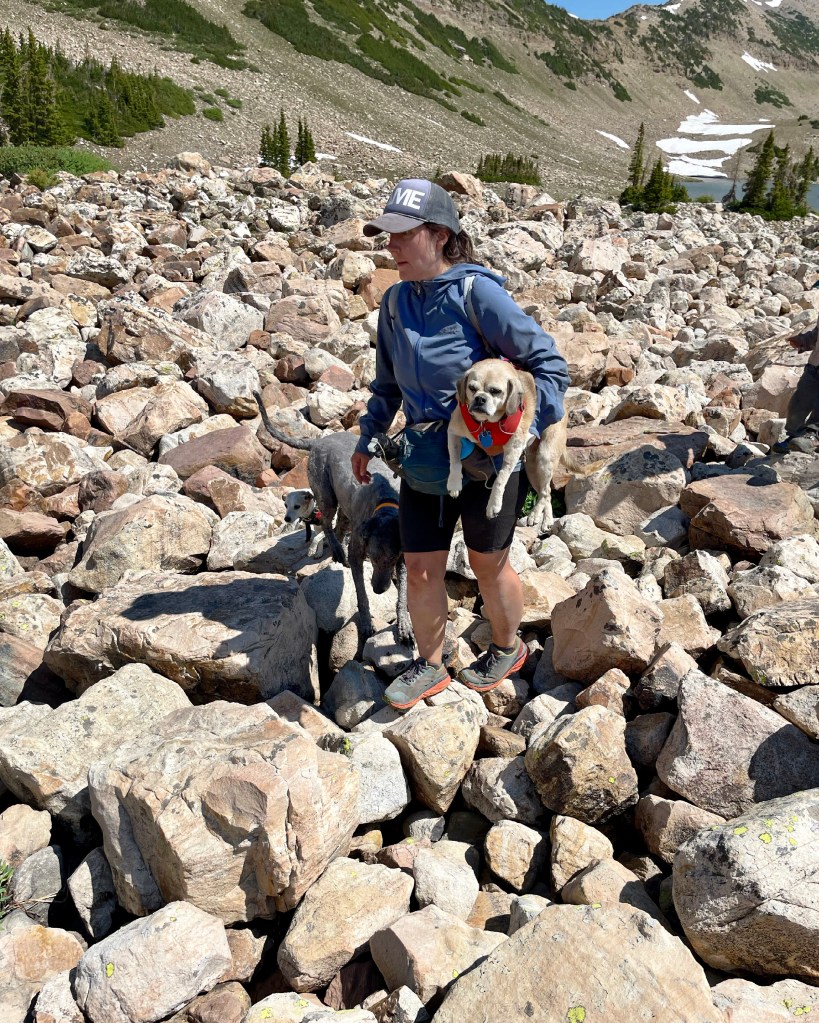
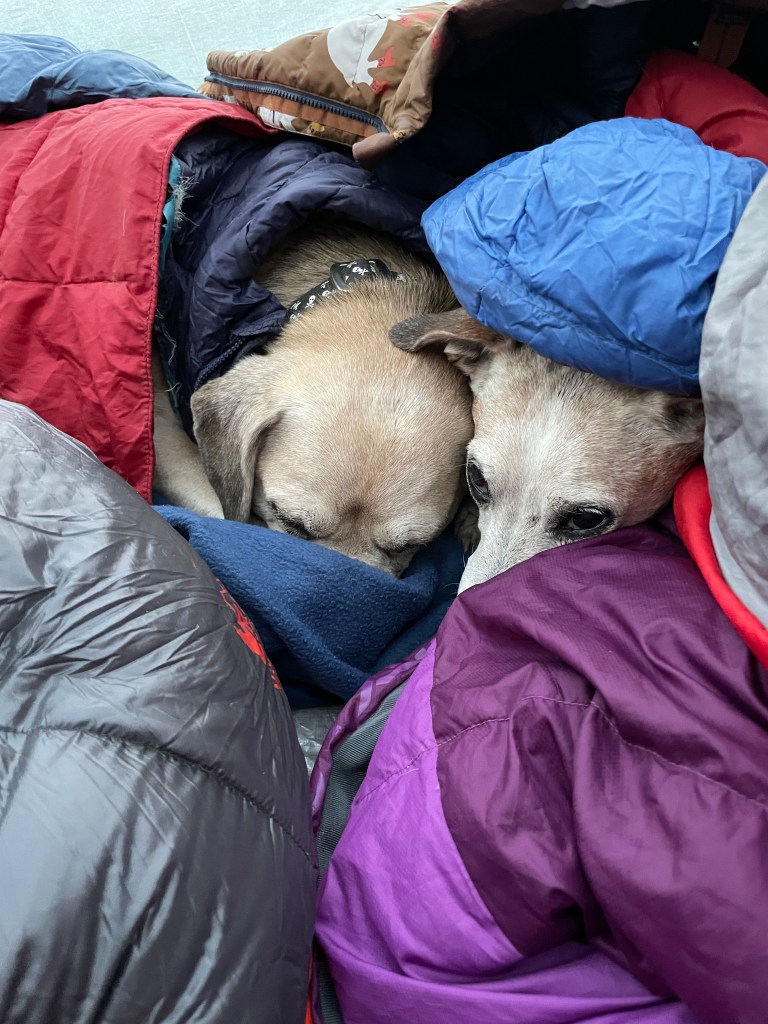
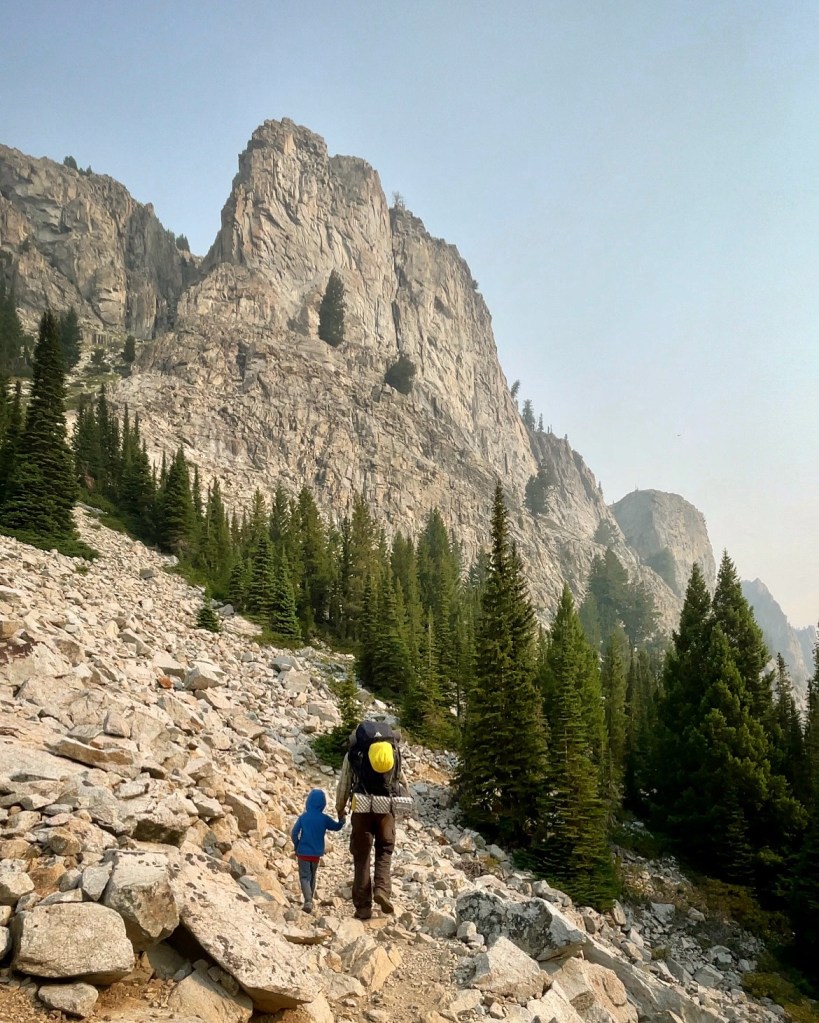
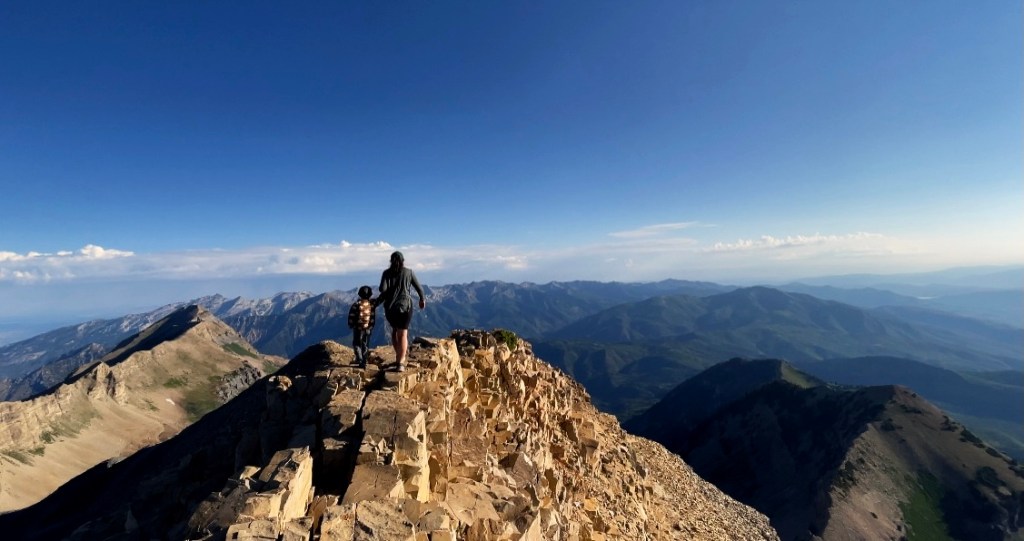
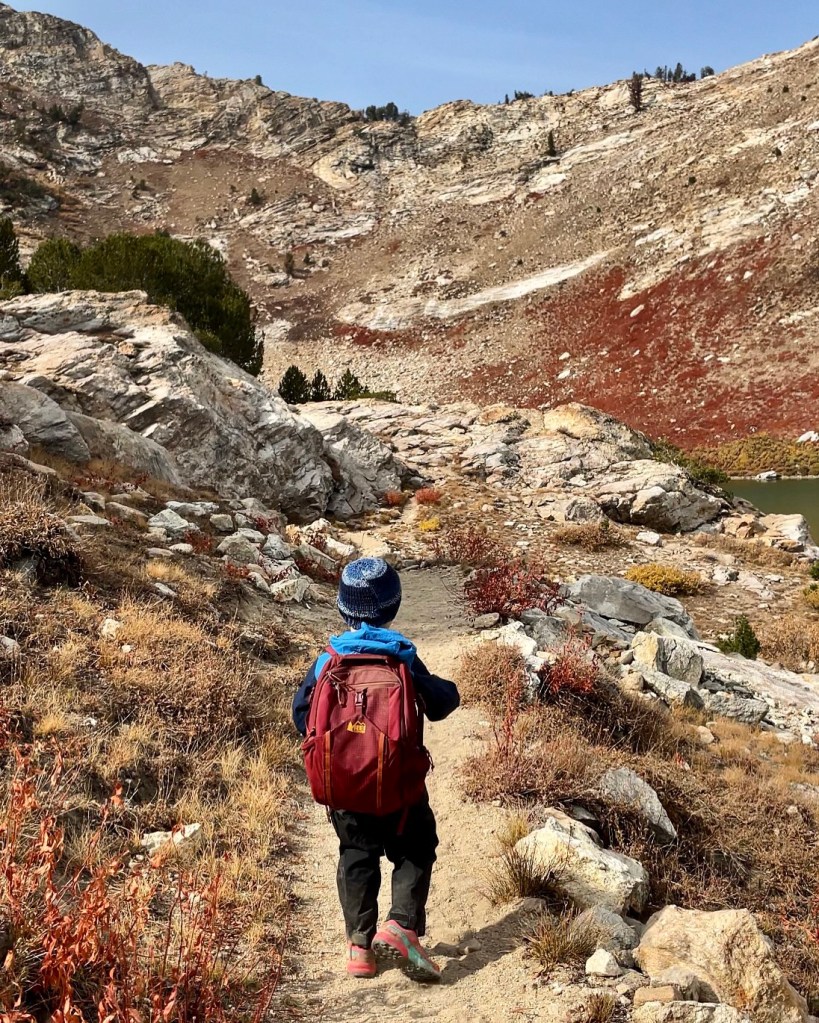
There are a lot of blogs out there with stats. I want to give a rundown of things I feel I didn’t know, but wished I would have. I combed the blogs and YouTube videos before attempting this with kids. In my opinion this is not friendly for most small children. If you hike with your small child on a regular basis and you can hike harder, longer miles and are comfortable with some exposure and slick down climbs they’ll be fine. Otherwise I’d wait till they’re a little older unless you enter and exit sneaker and have rappelling experience. Most families with small children did exactly this.

Rappelling Into The Gulch

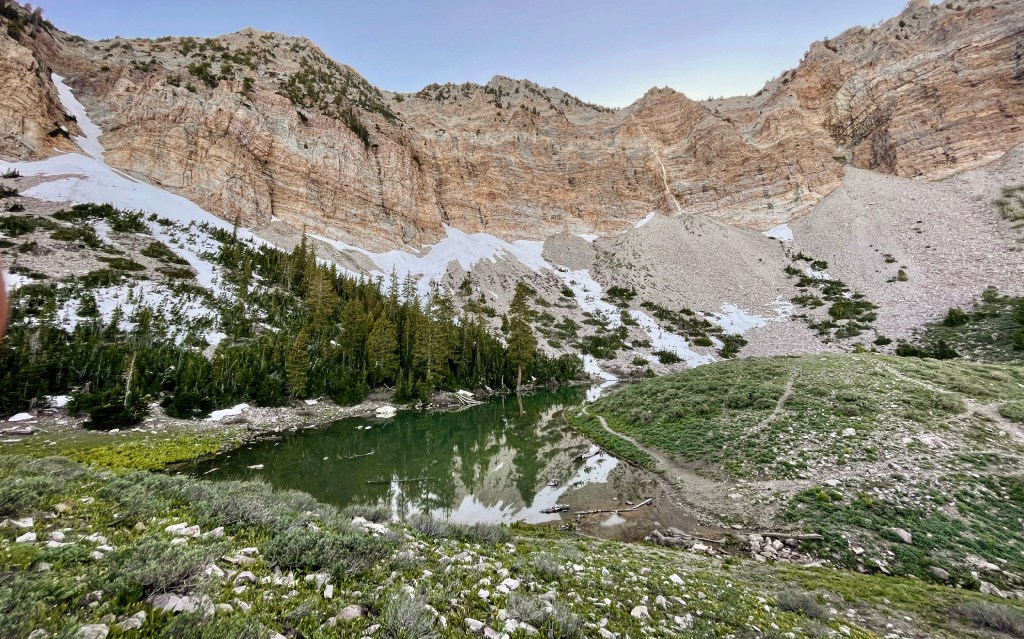
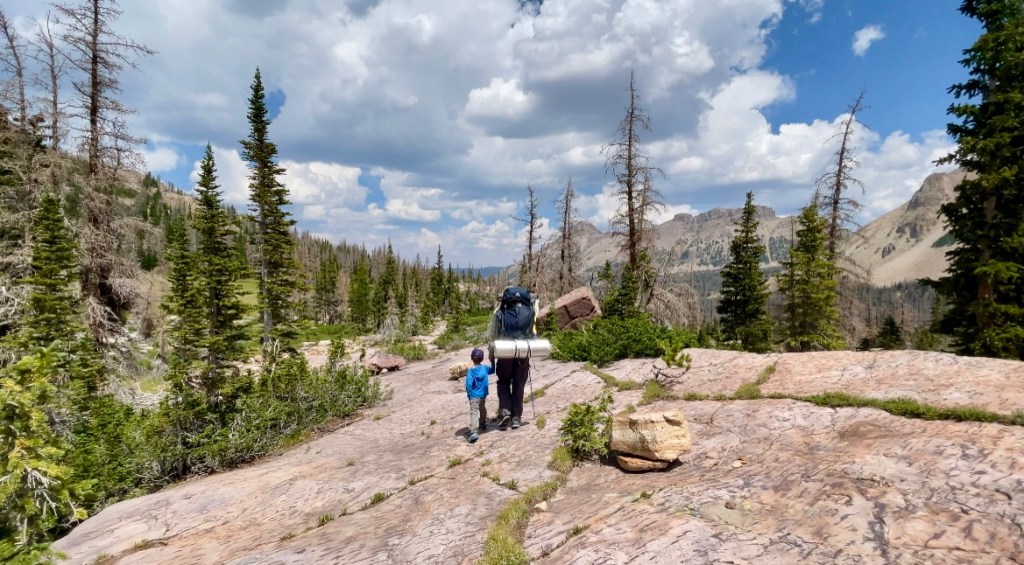
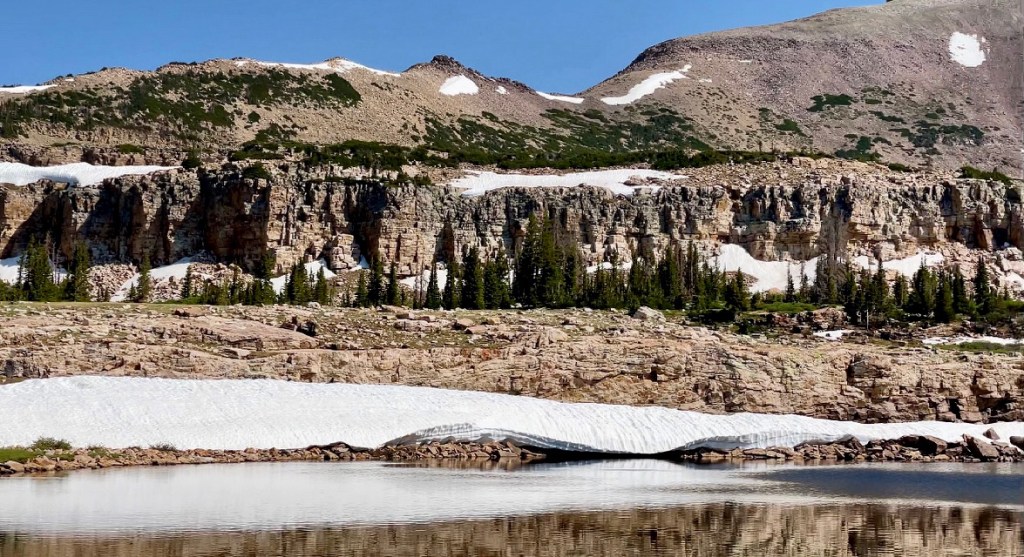
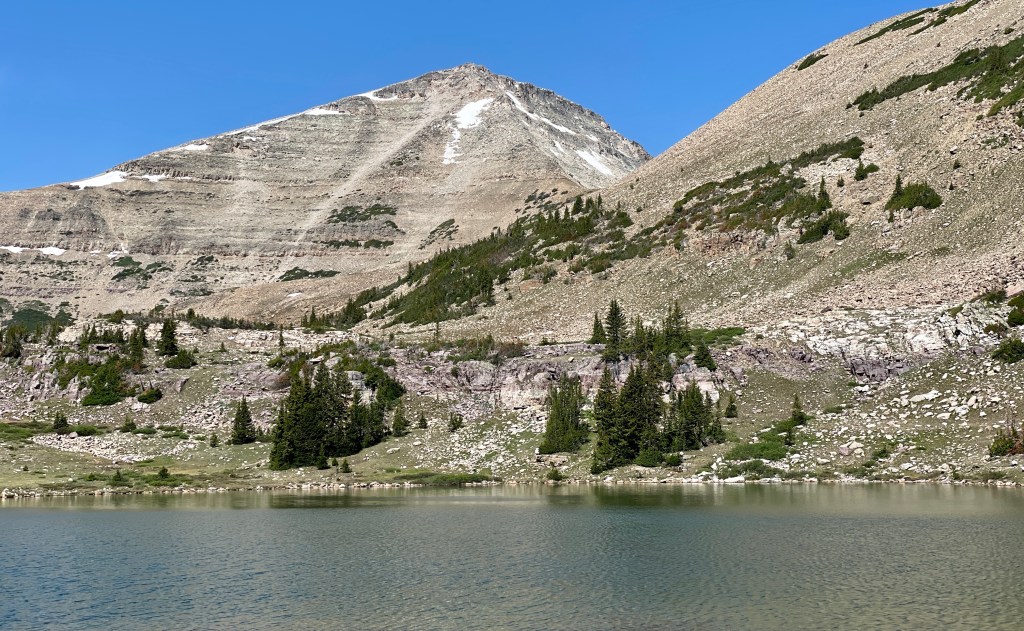
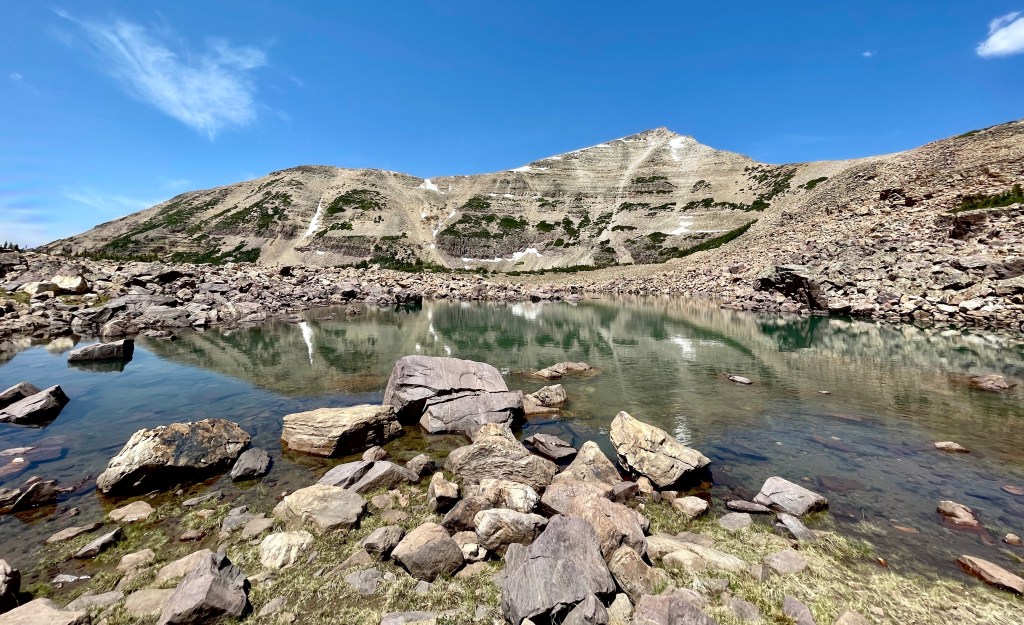
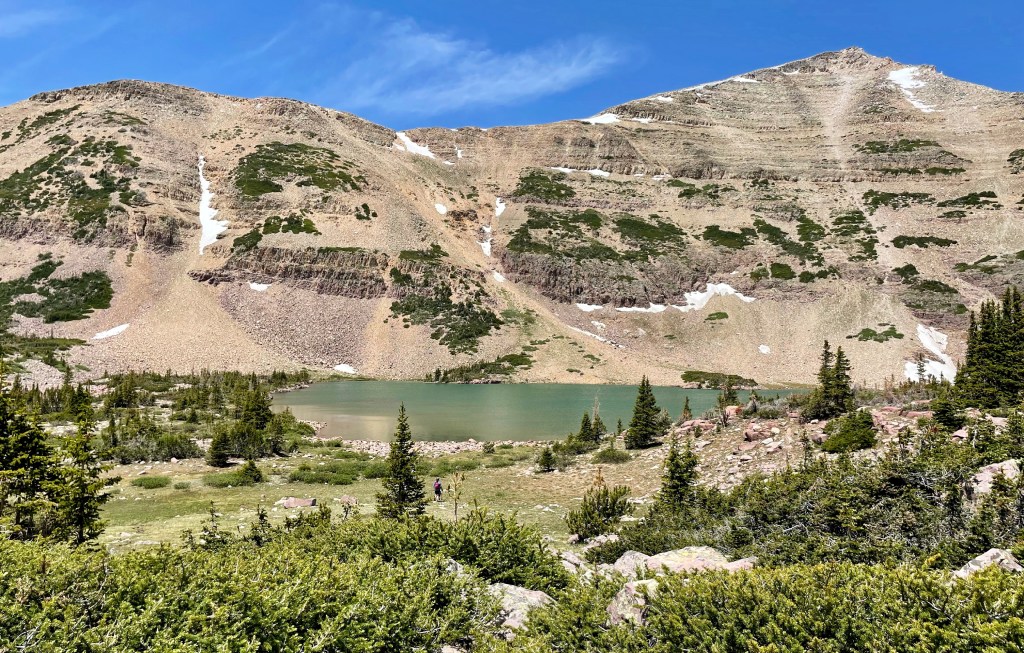
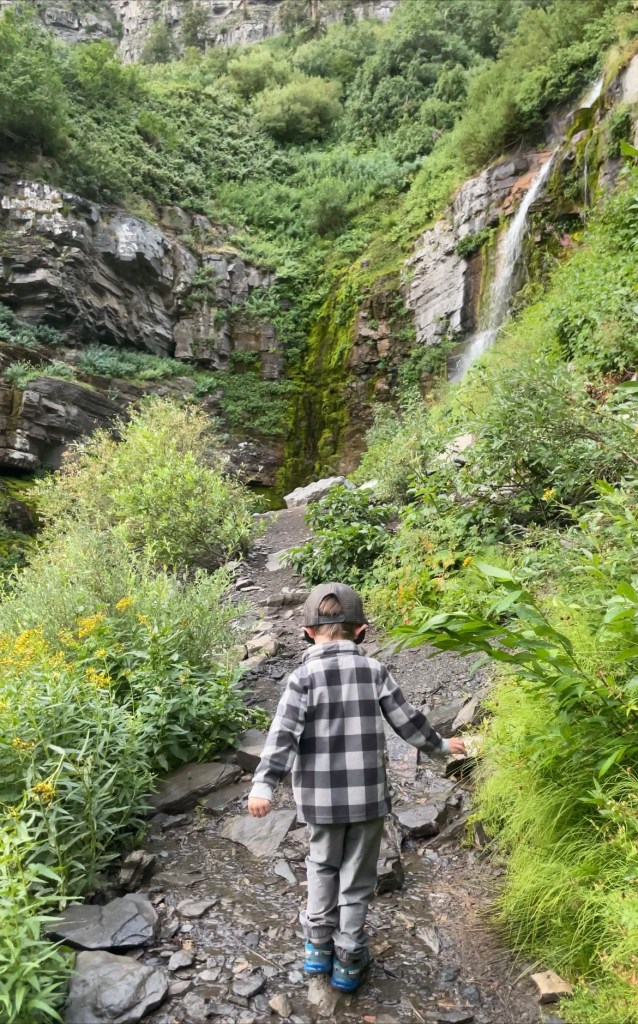
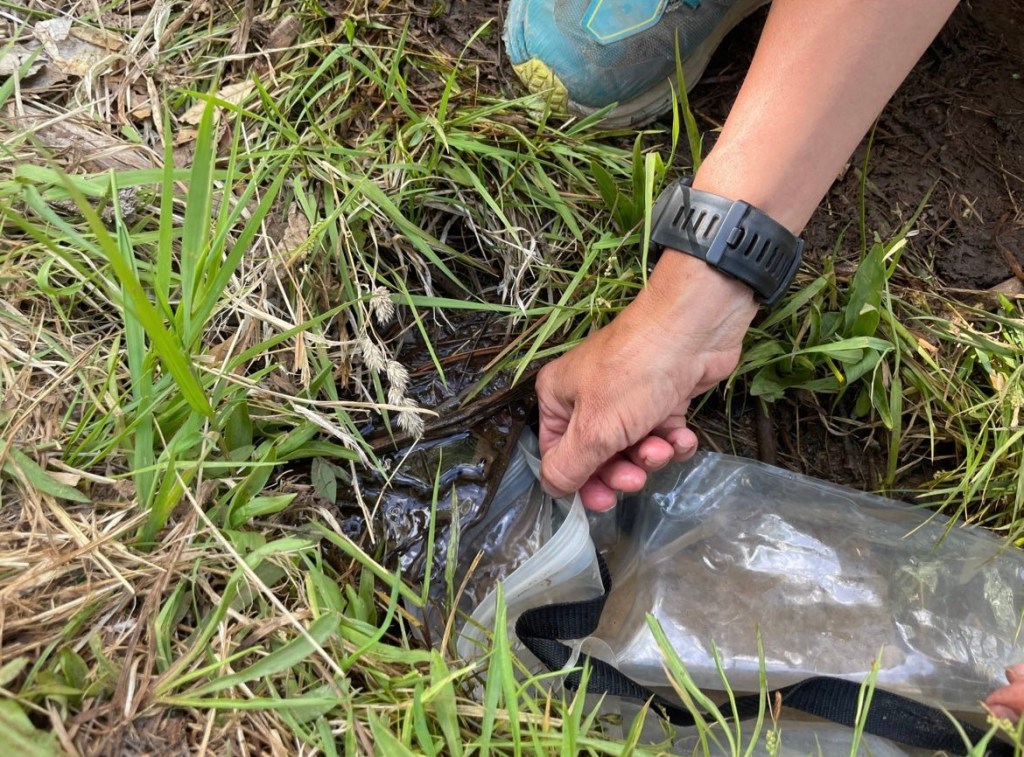
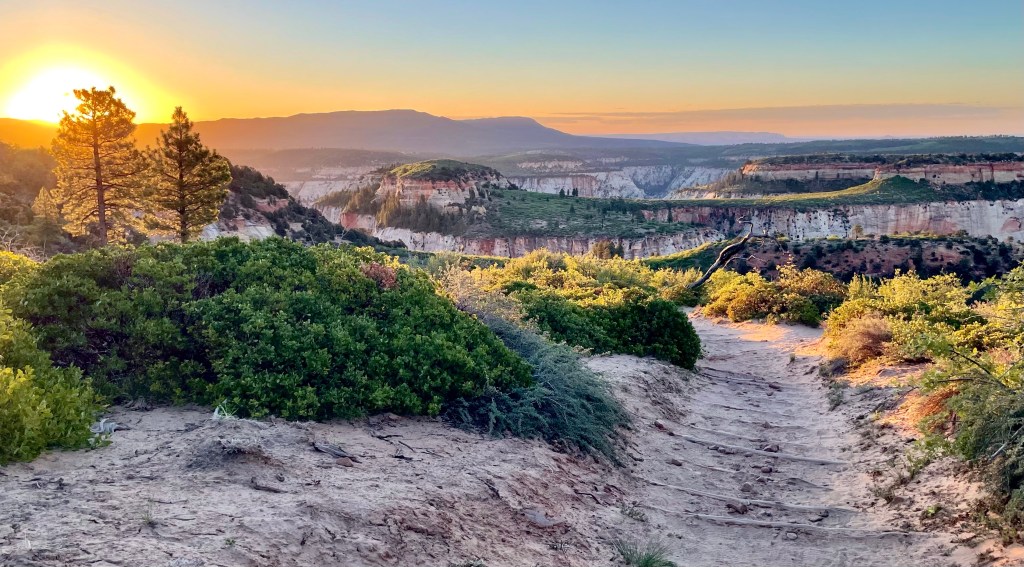
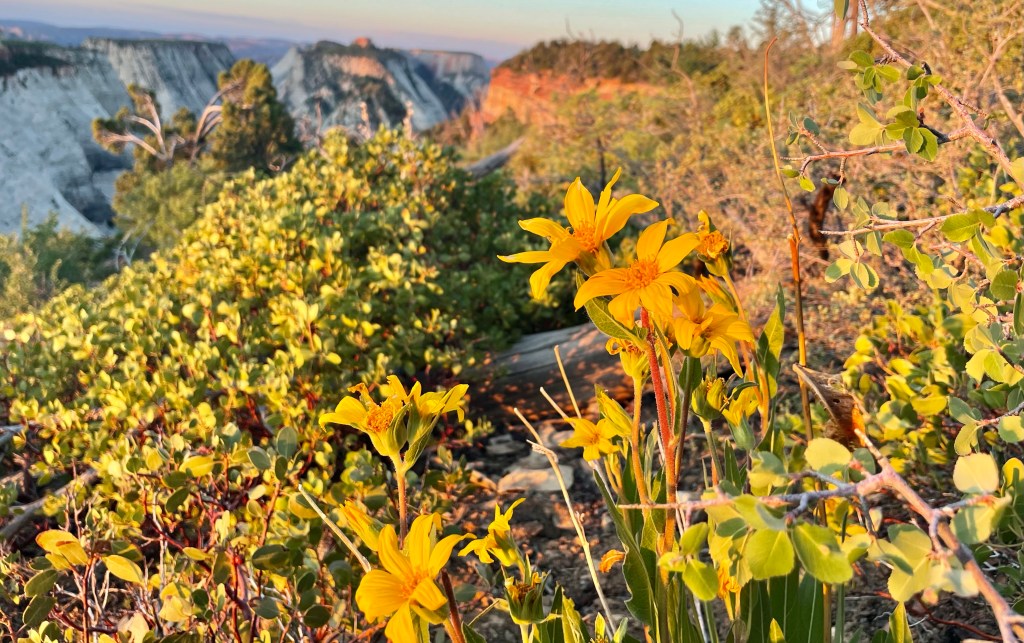
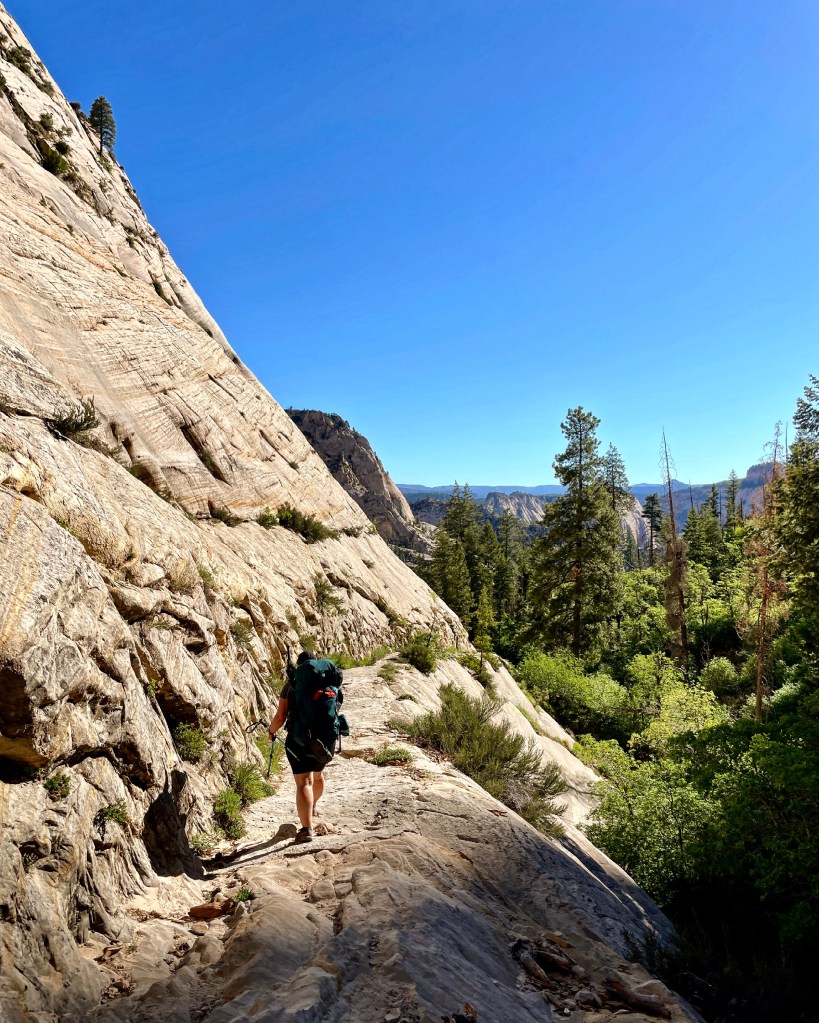
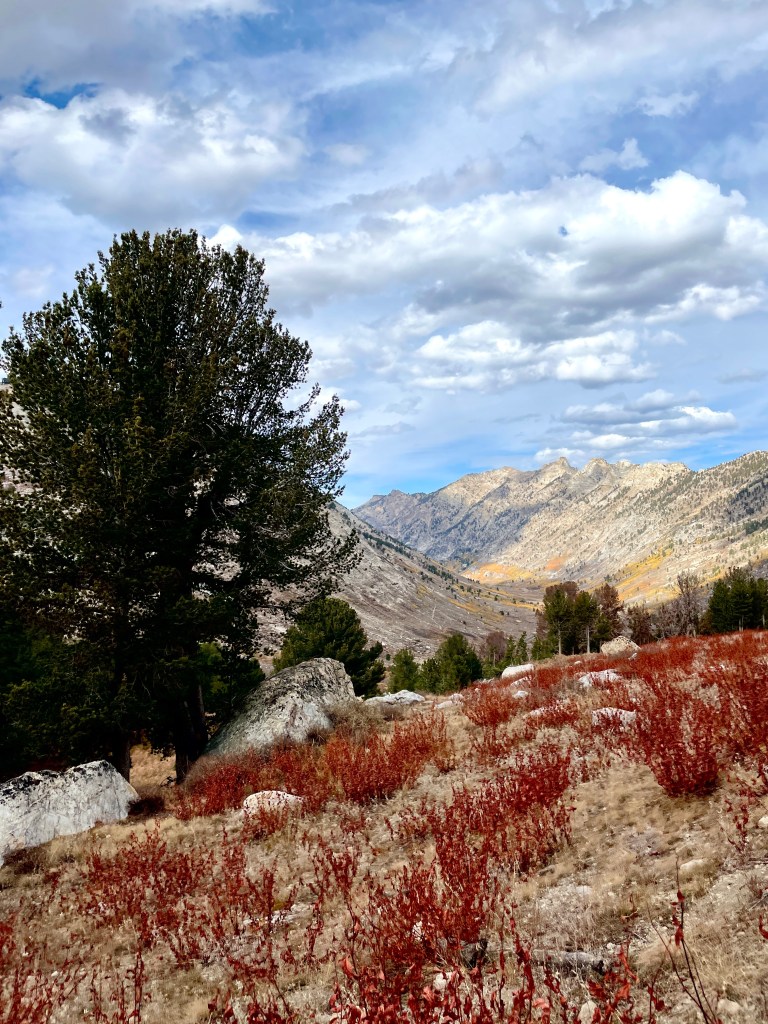
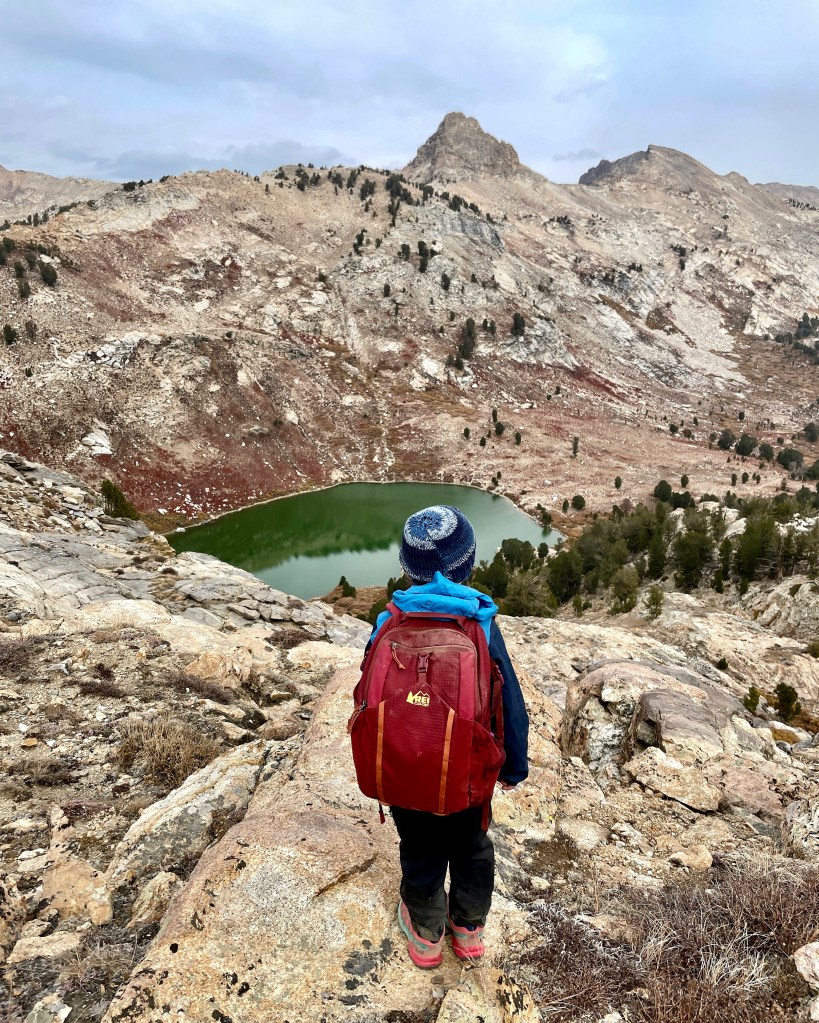
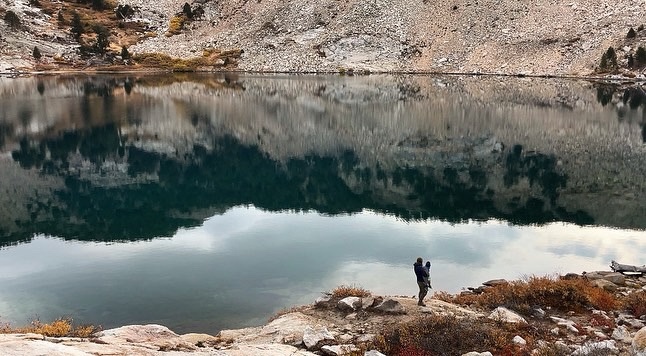
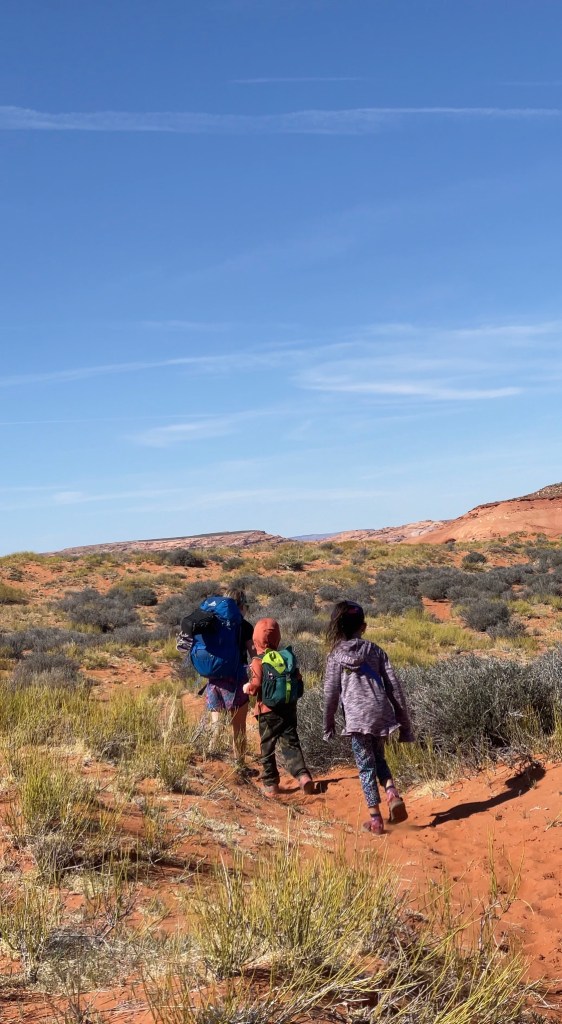
The hike from the Jacob Hamblin TH (tanks/sneaker) starts out for the first half mile over sand. The trail is very intuitive. You can clearly see the path most taken. After you’ll hit slick rock and be looking for cairn stones. You’ll rollercoaster, but the cairn stones are fairly close together and easy to spot. I still highly recommend gps. Being out in this area it’s easy to understand how people get lost in the desert. Everything looks the same. It’s hot and unforgiving above the canyon. Even in early spring the temps were brutal. There are no water sources until you get to the bottom of the canyon. We burned through a liter a person just doing the short 1.8 mile hike to where you’ll drop into the canyon. As I said, it’s hot AF.

Searching For Cairns

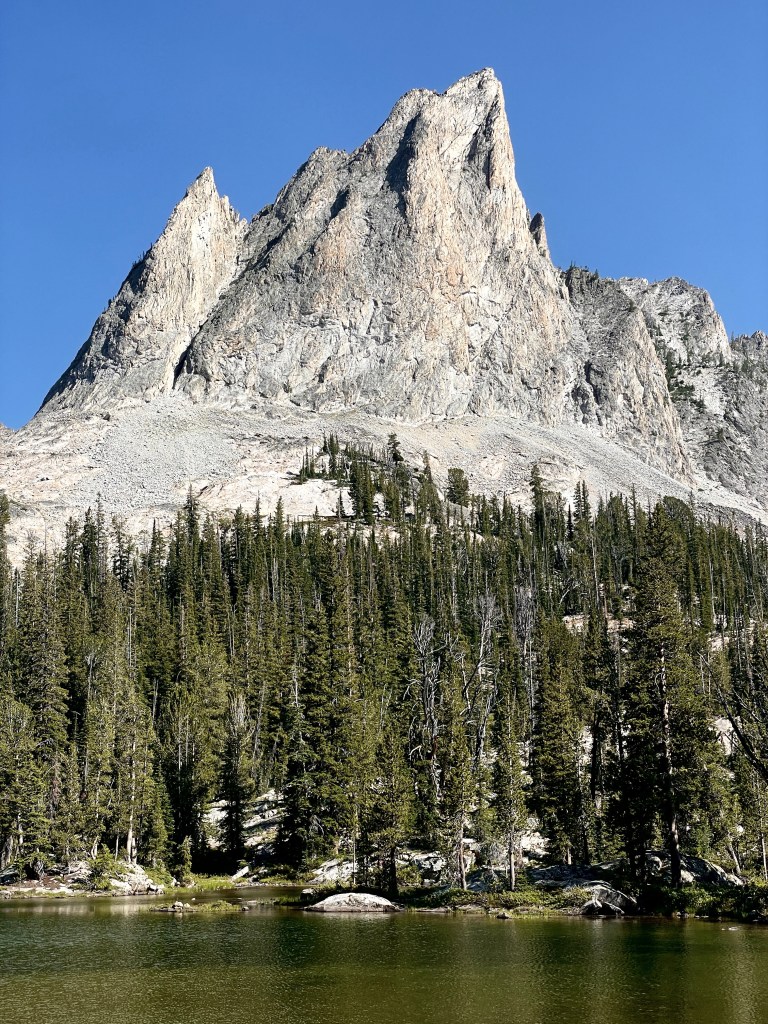
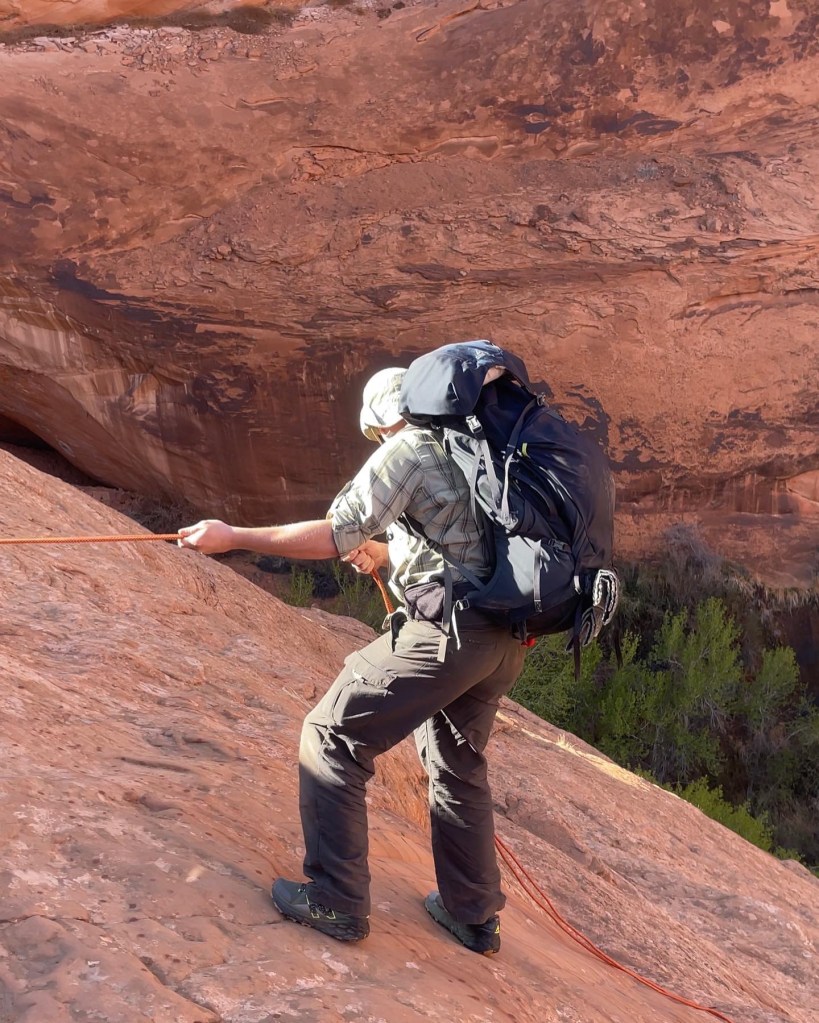
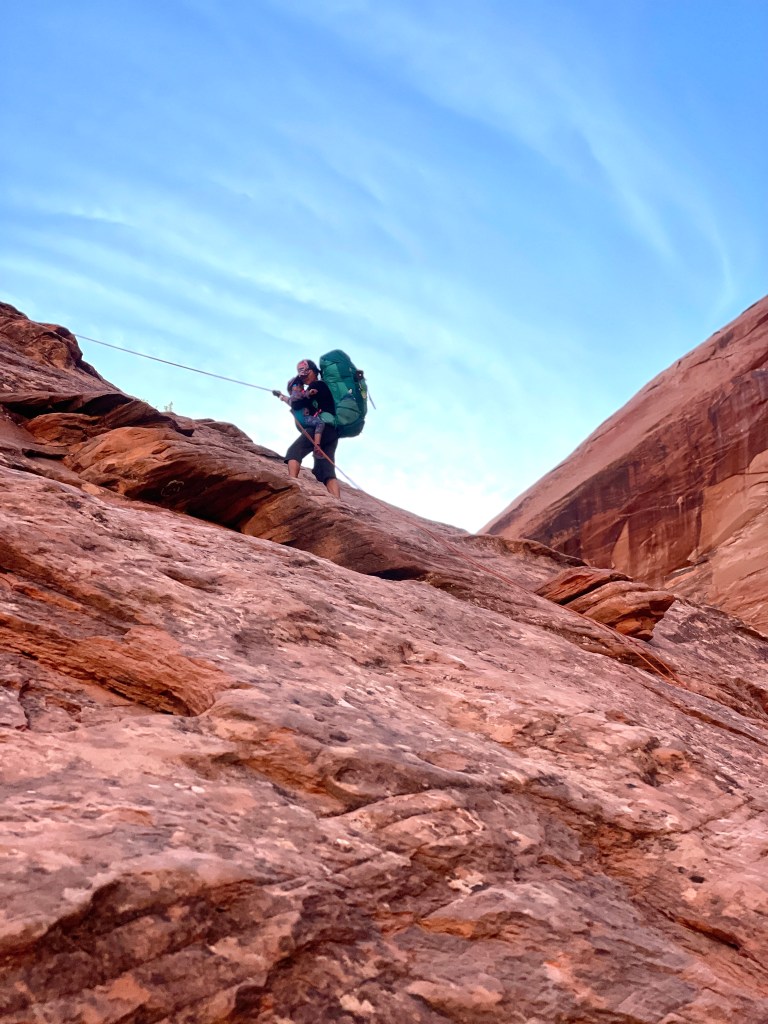
You’ll know you’re in the right spot because there will be a huge white marking that looks like a V or an eagle flying on the canyon wall. There is a natural sand stone anchor, but it’s wearing thin with how popular this route has become. I’d guess it’s not very long until it’s no longer viable. I wouldn’t trust more than one person on rope unless one was a child due to how thin the anchor is. Some people do not use ropes. I would never not use a rope with a child. Can you manage your way down with a heavy pack and no rope? Yes. But it is slippery in parts and with all that unbalanced weight on your back it’ll be a hard send. We watched a lot of day hikers successfully climb out with small day packs on. Some refused rope and later found themselves grabbing for our rope when they found themselves in a precarious situation. It’s steeper and trickier than it looks. Ascending would also be easier than descending. I’ve done both with child and pack. You can also leave a rope hooked up to the anchor if entering and exiting sneaker. You just need to wrap duct tape around the bottom and date your exit. If you don’t the rangers will come by and remove it. Leaving a rope would eliminate the need for someone to free solo up in order to install rope on the way out.

Right Before The Drop

I recommend wearing trail shoes with plenty of tread. There’s a reason it’s called slick rock. Also, if you are bringing a kid in or out this direction I found the easiest way is to go down with a pack, drop pack and then go back up and soft carry them down. This trip we used the trail magik that hooks into our backpacks. Our kids were larger children so we had a lot of weight. We all are experienced with rappelling so it was manageable. I’d be nervous for someone who wasn’t to try this with that much unbalanced weight. Also, gloves will help save your hands. For reference with our rope, we hooked it up the climbers way and tie a figure 8 knot at the end. That way we can just untie and pull rope through anchor. We used a 200 ft rope. It barely reached. I know that’s a lot of rope to carry, but our kids safety was more important to us than carrying extra weight. If you’re afraid of heights this will not be a good route for you. I’ve seen a few meltdowns from other groups that also were roped. Rappelling with a heavy pack is a very different animal than rappelling with my canyoneering bag. In pics it looks tame. In real life you’ll encounter something very different.

The Rapell

There are no fires or dogs allowed in Coyote Gulch. You must also carry out all your poop and toilet paper. Please practice leave no trace principles. If carrying out your waste and TP is too gross of a thought then this isn’t the appropriate trip for you. There are some great established campsites in Escalante with bathrooms. I find wag bags on Amazon and I find if I bring a ziplock bag to place it in and then put it in a cheap dry bag the smell isn’t noticeable. When I’m done I just pull the ziplock out and throw it in a trash can.

Jacob Hamblin Arch
Jacob Hamblin Arch

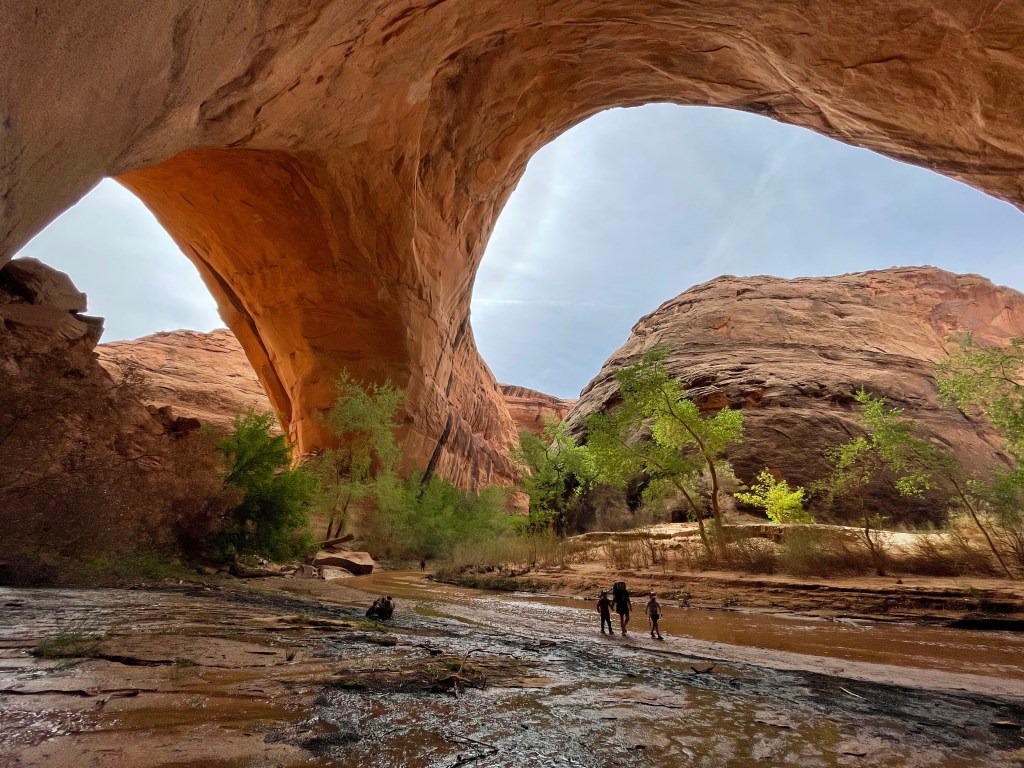
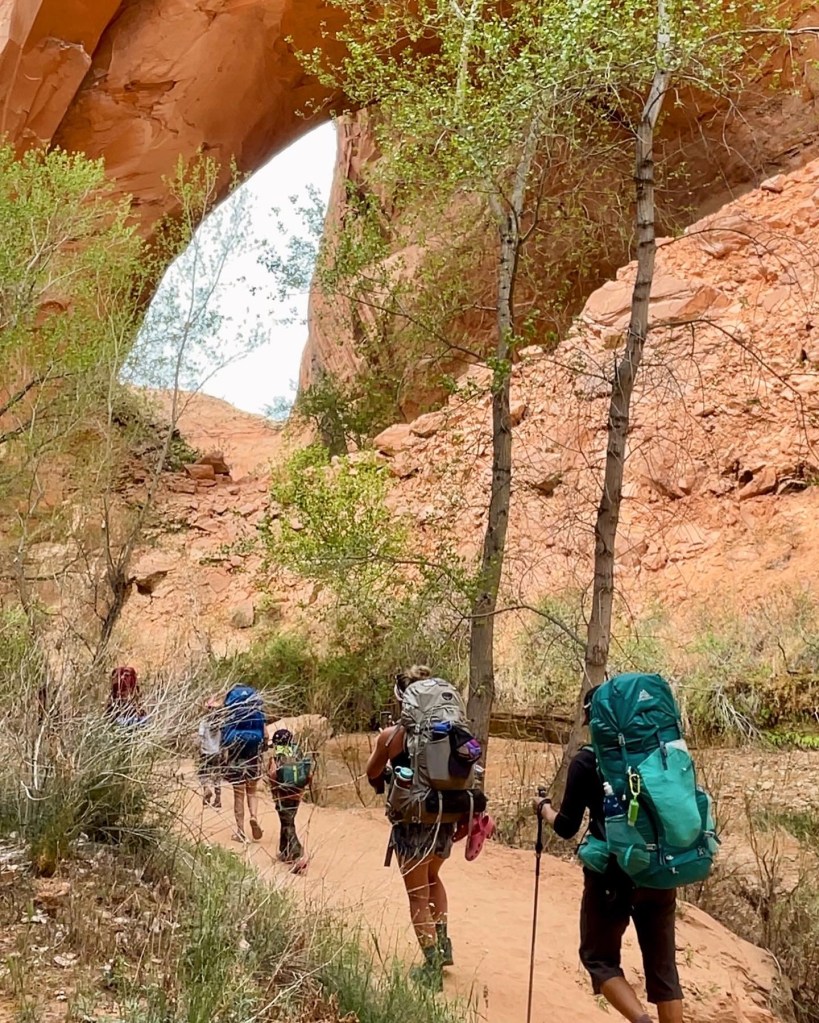
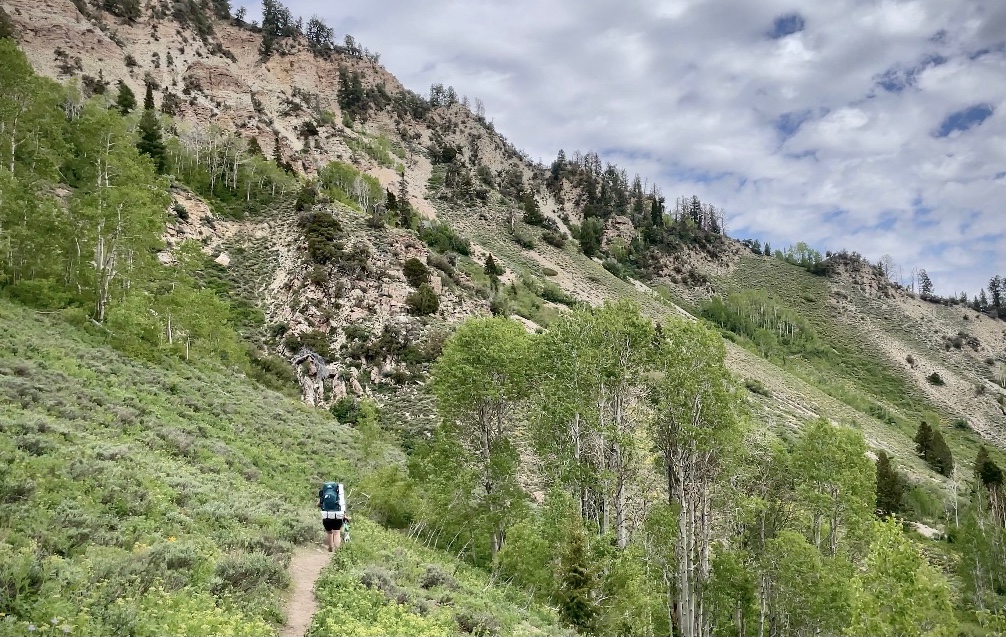
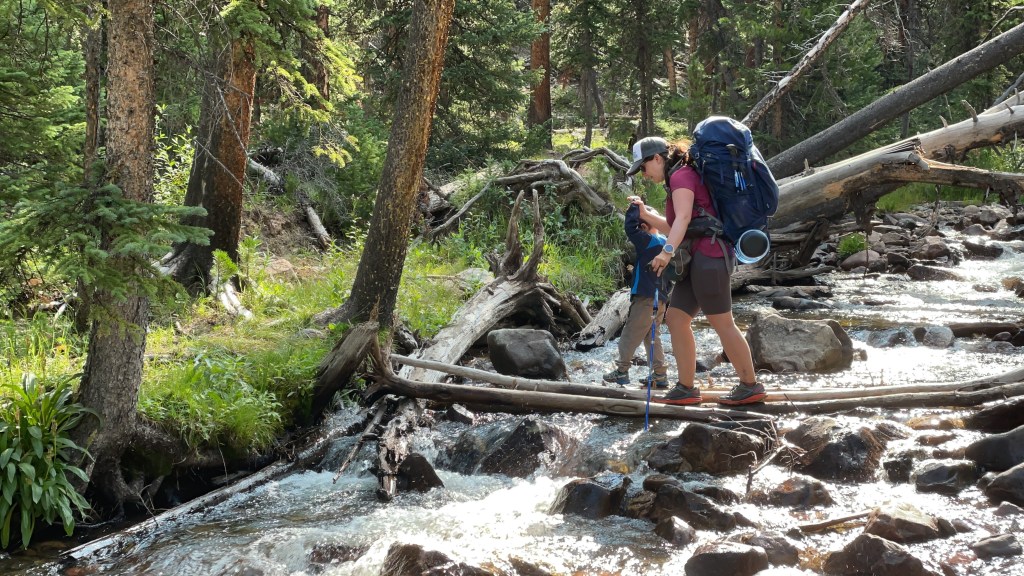
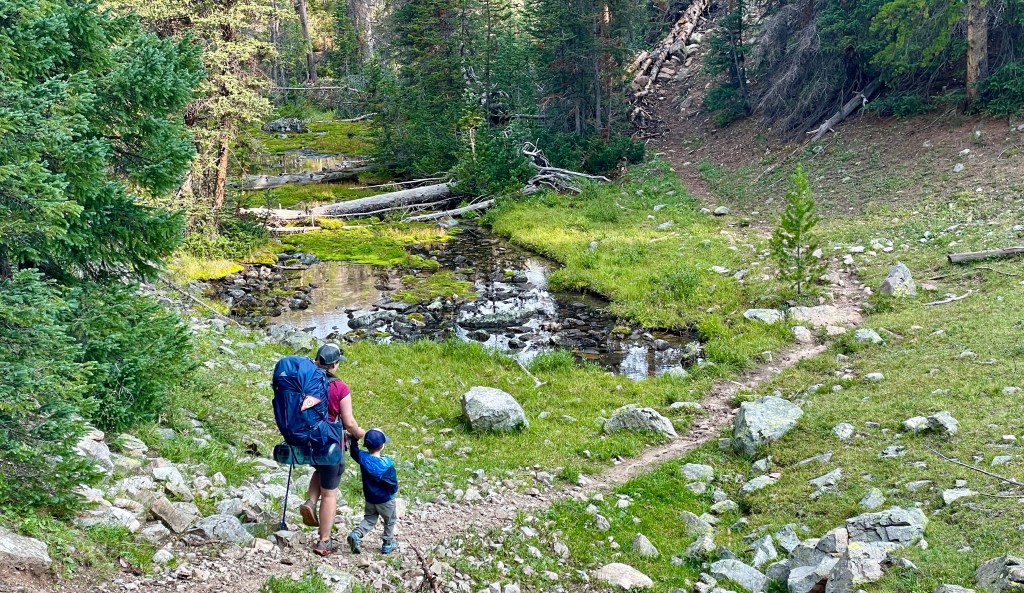
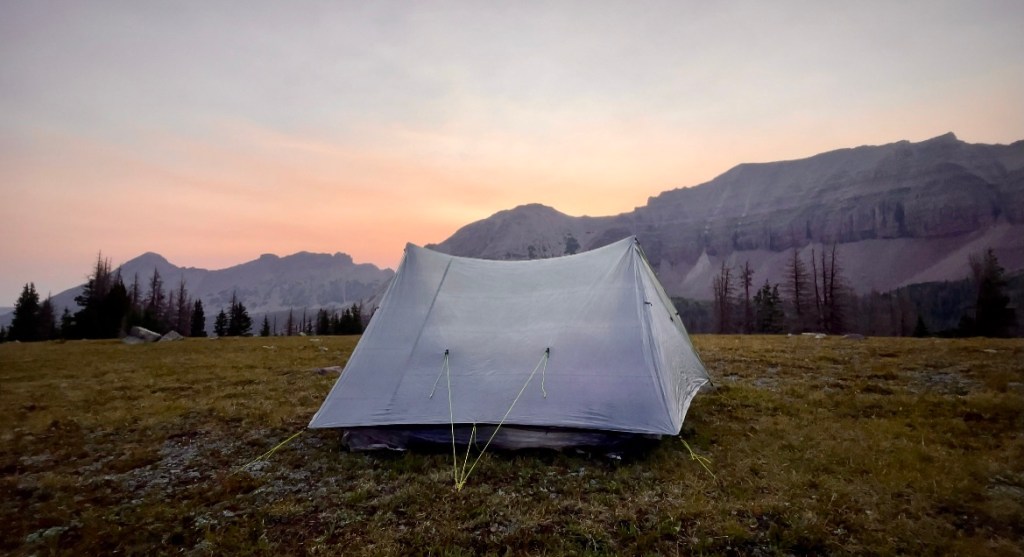
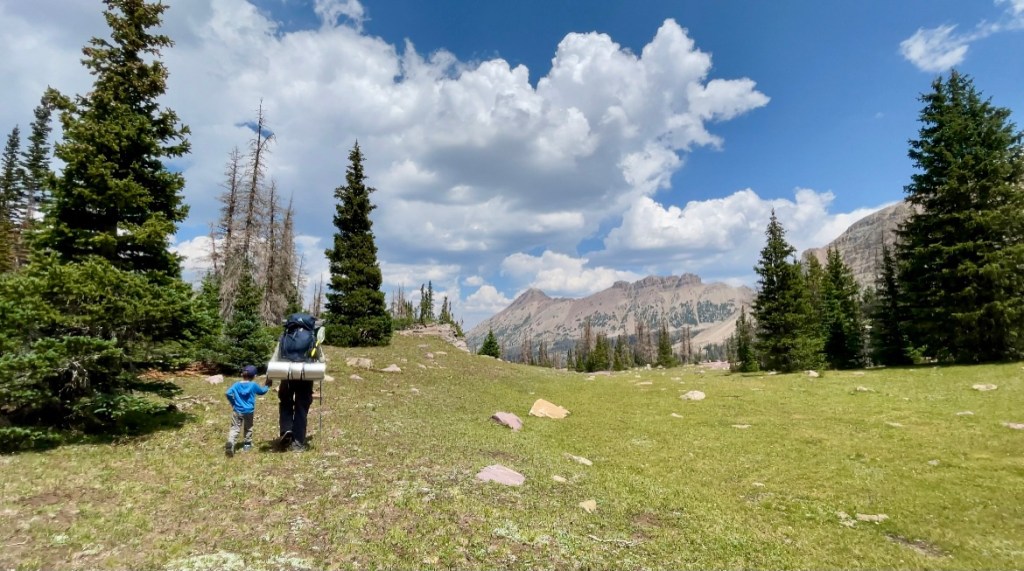
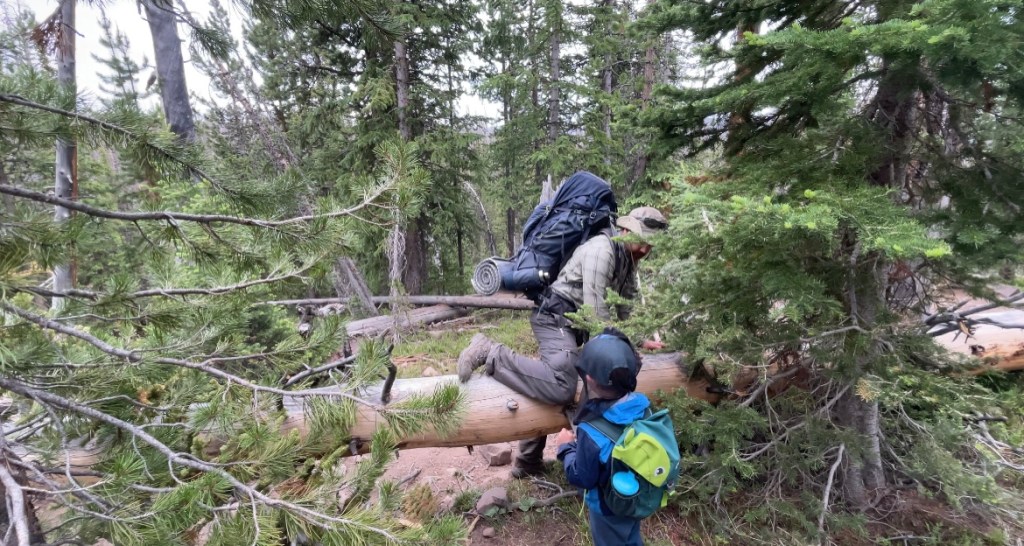
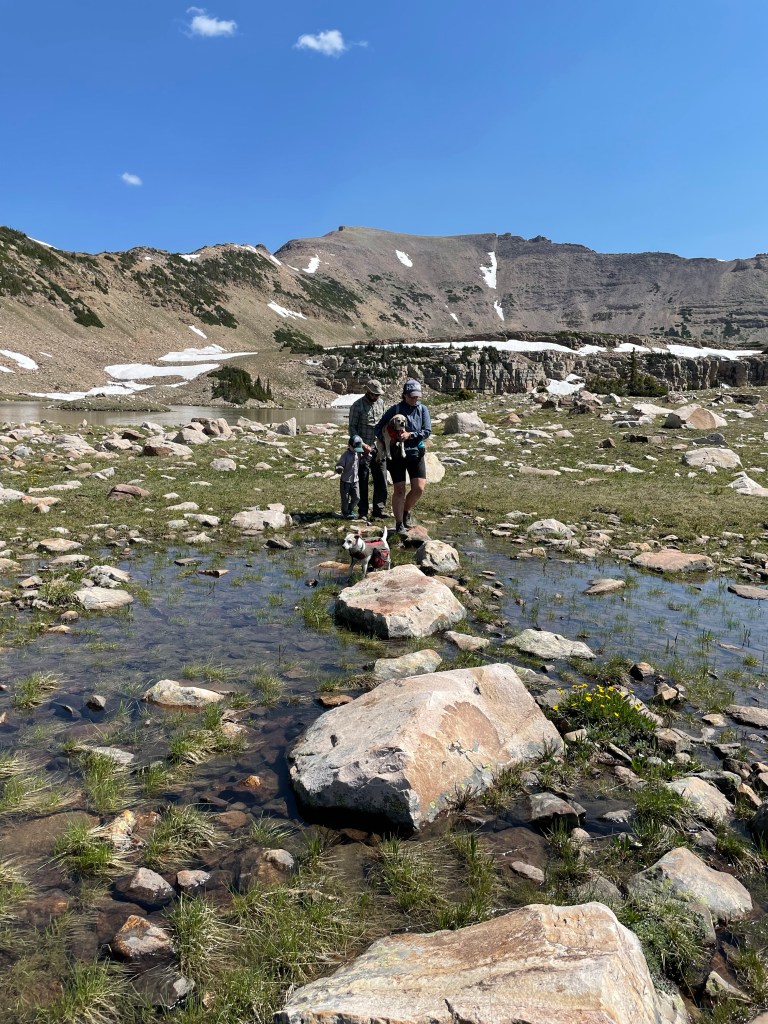
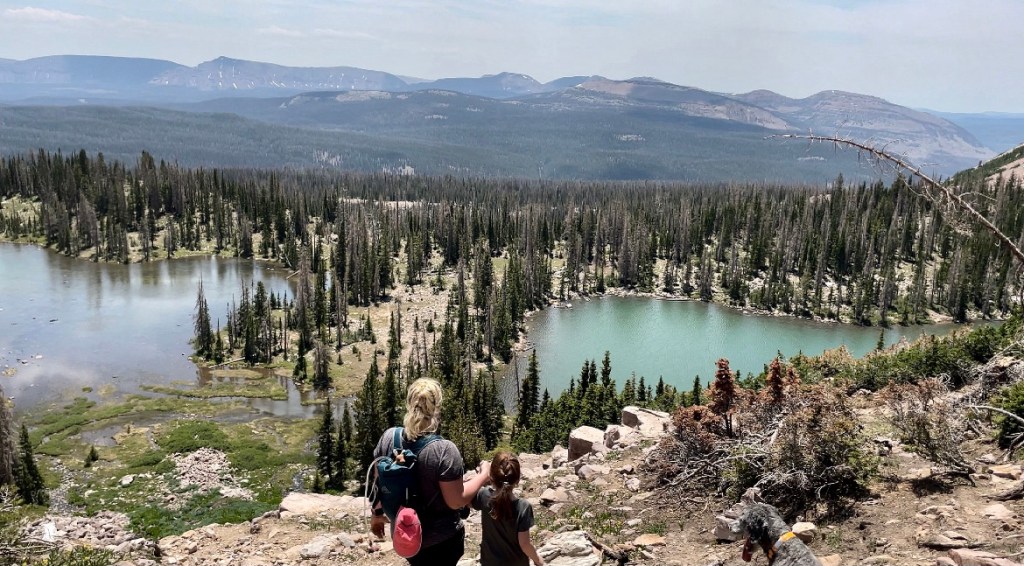
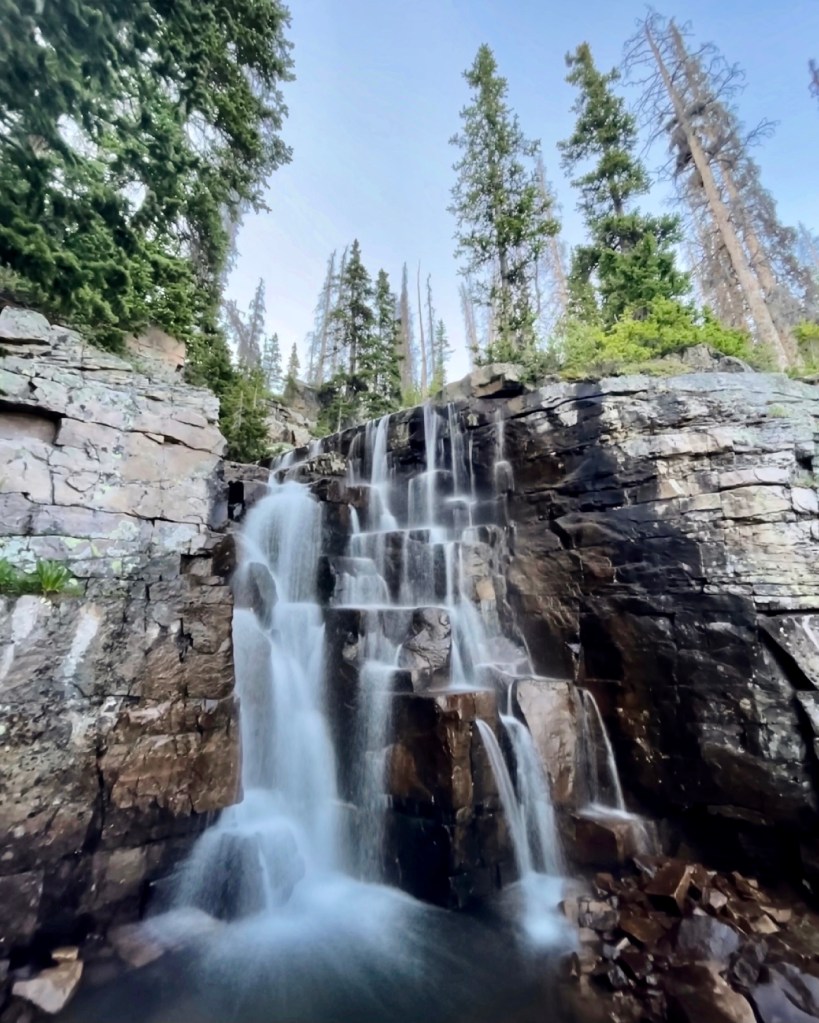
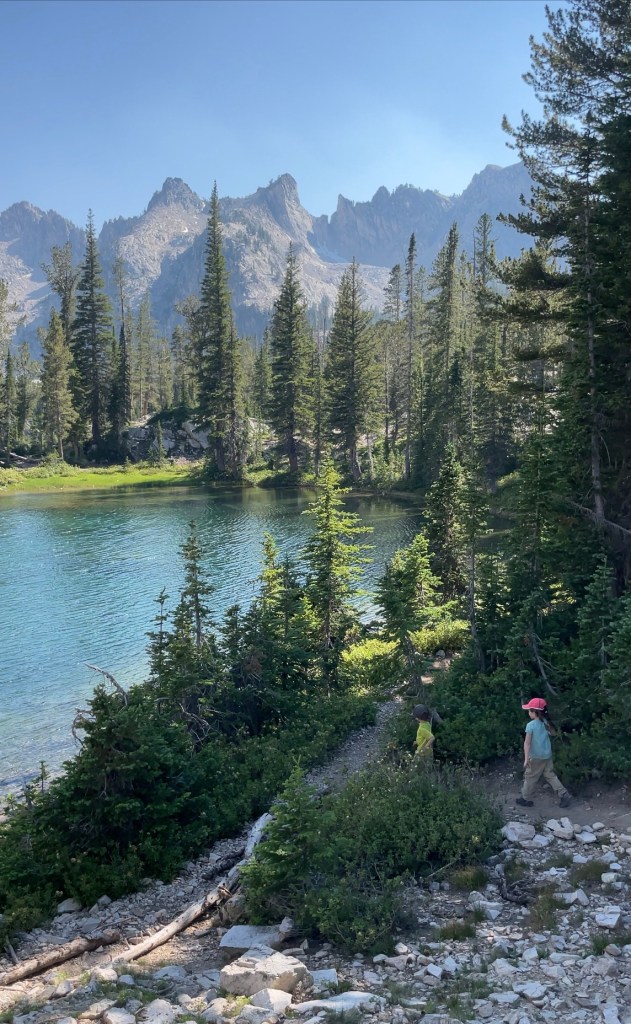
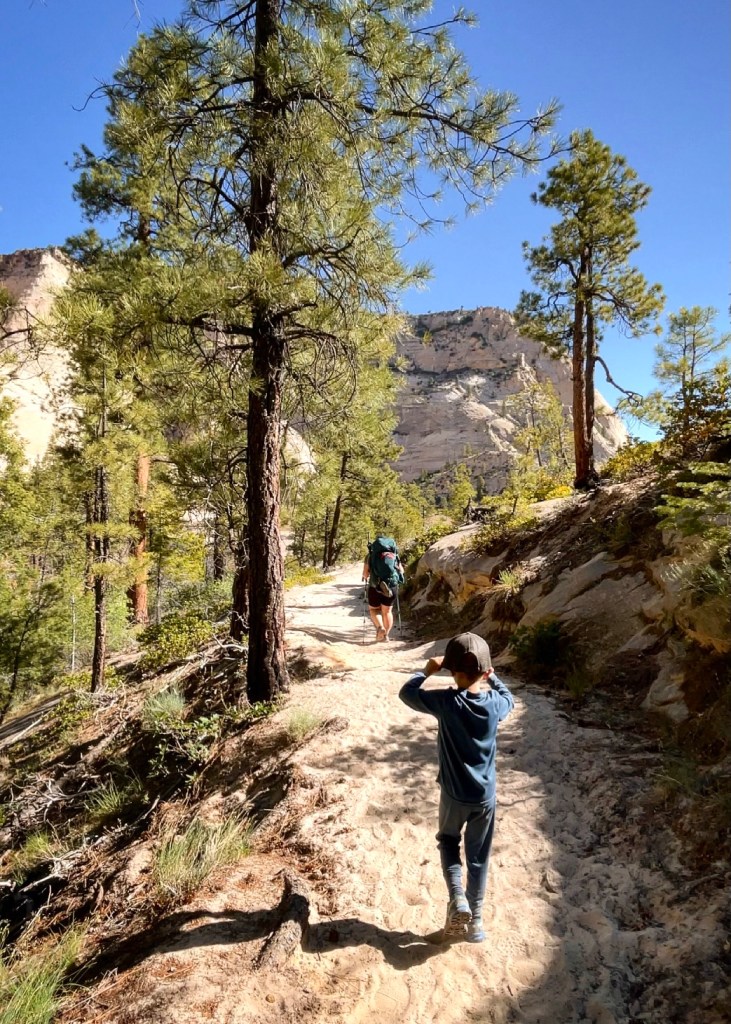
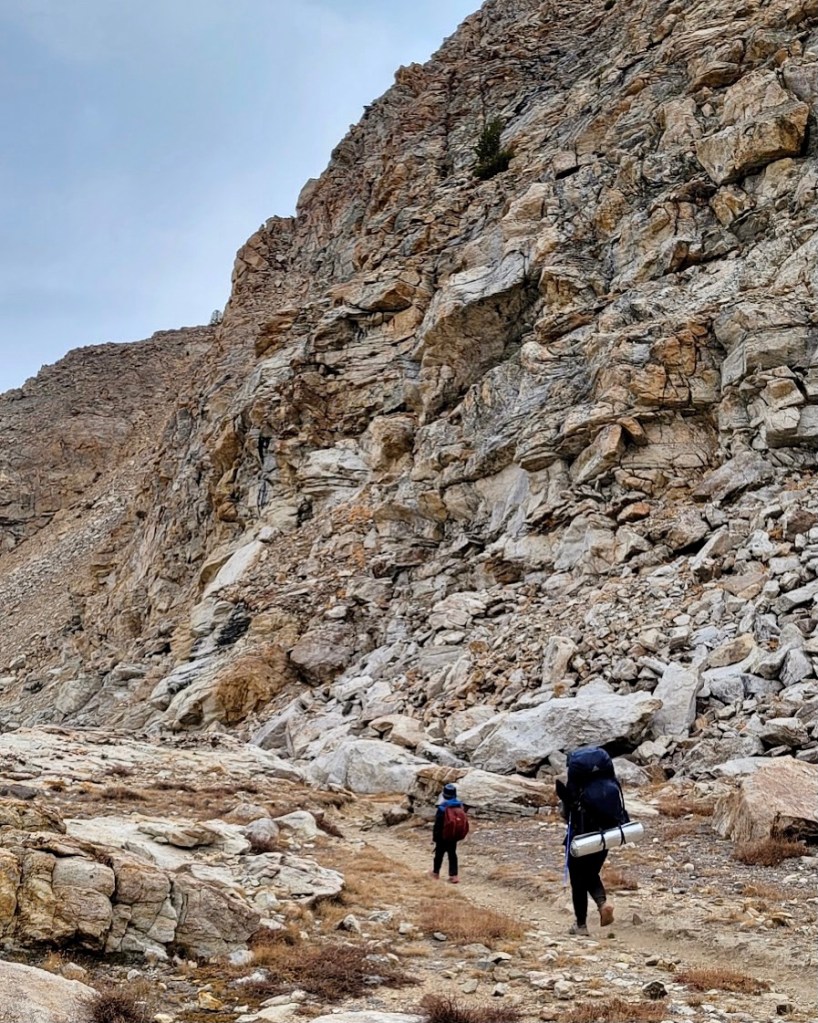
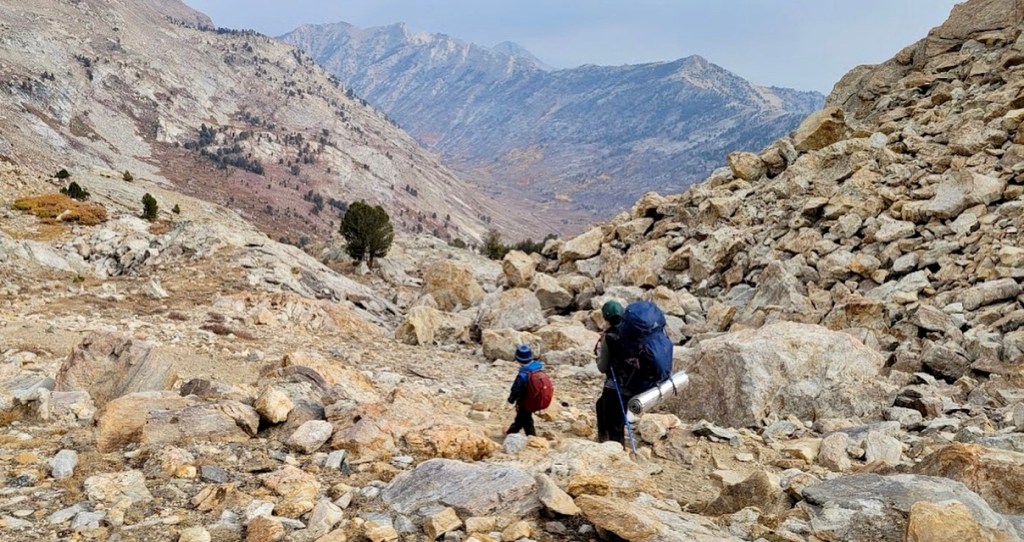
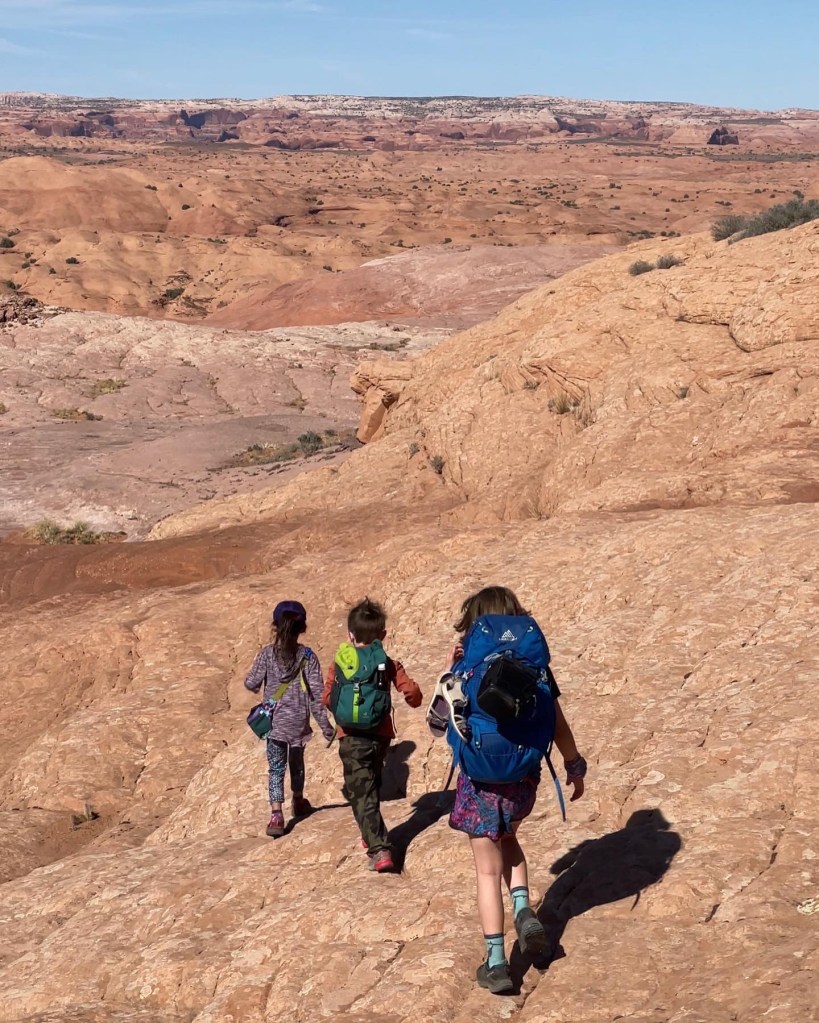
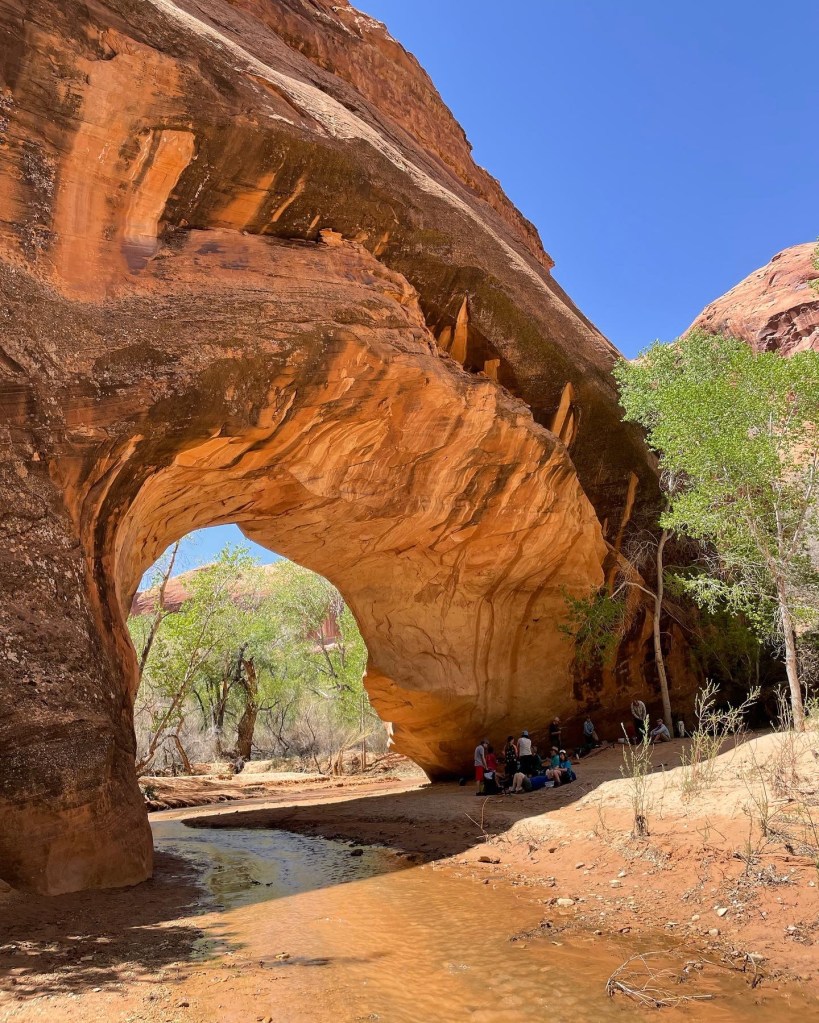
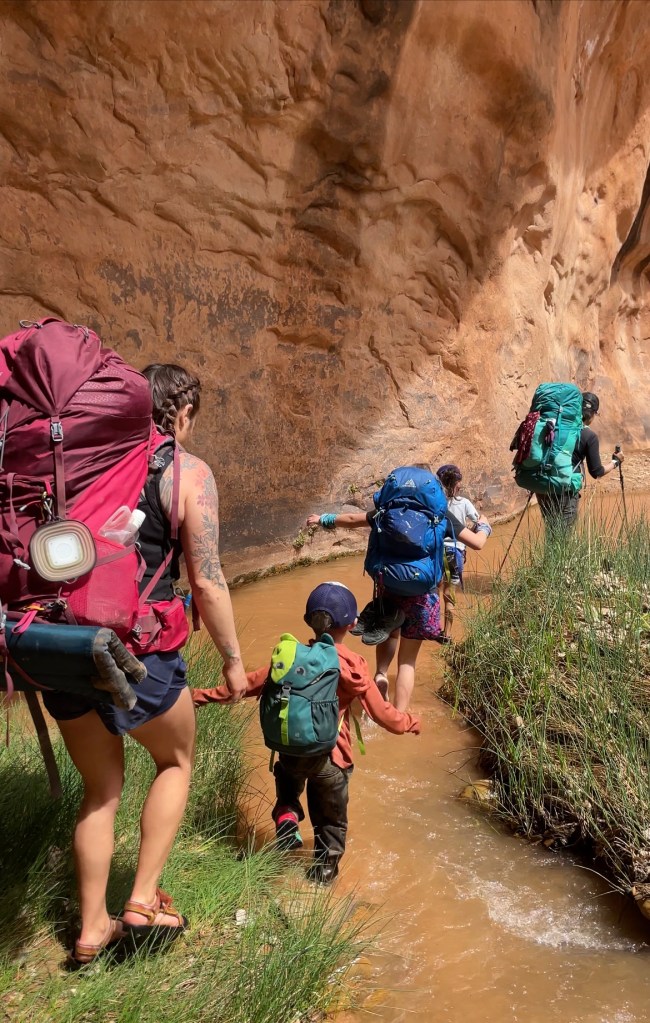
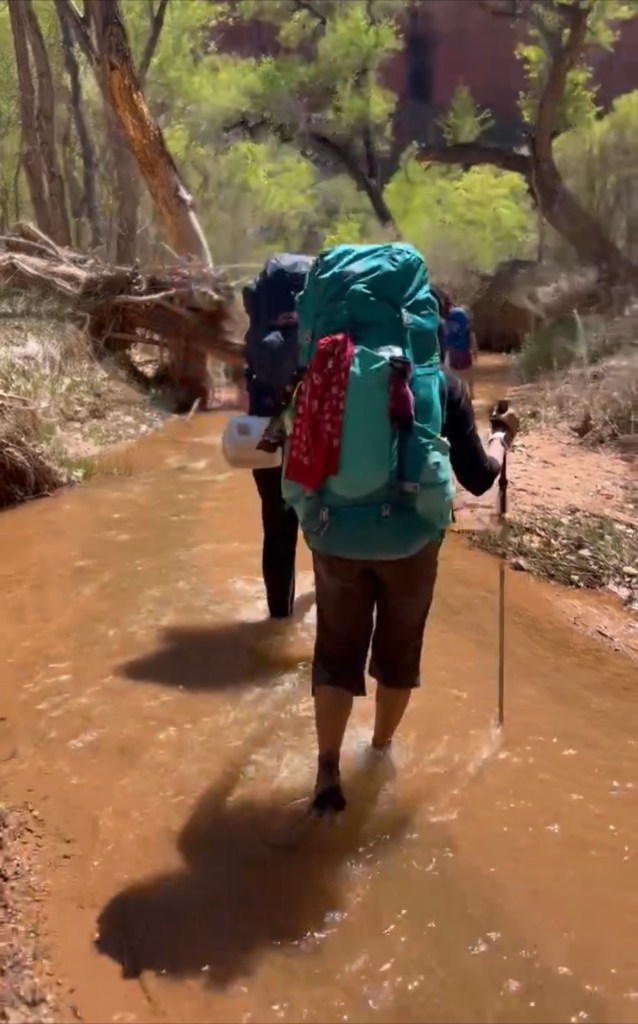
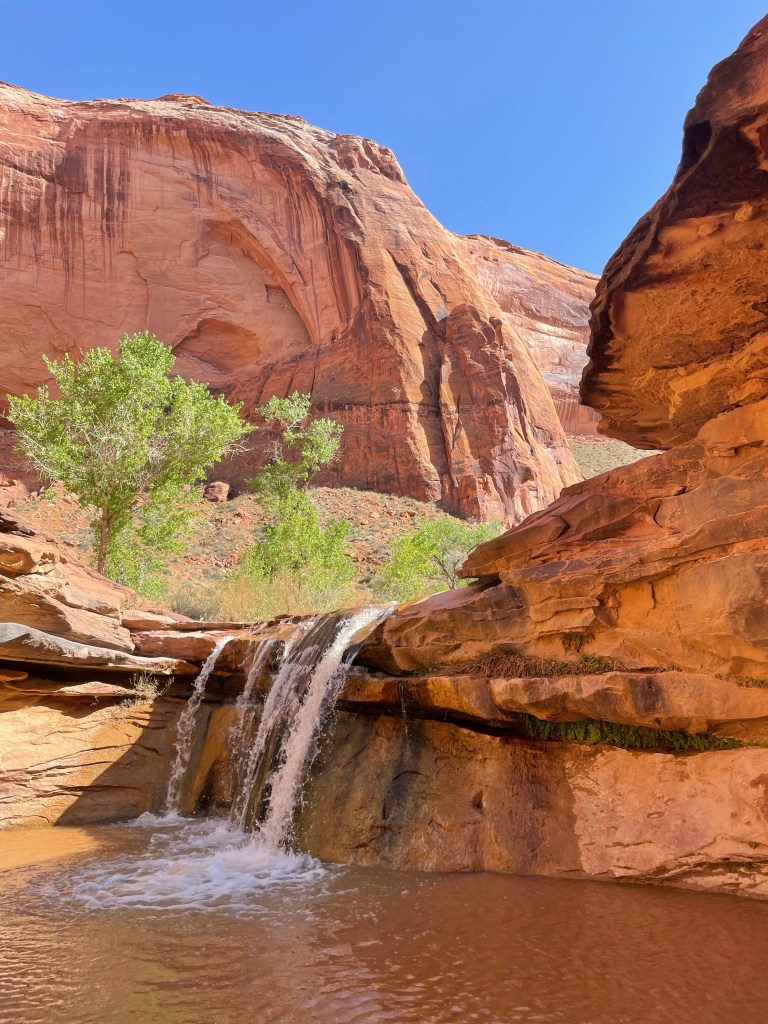
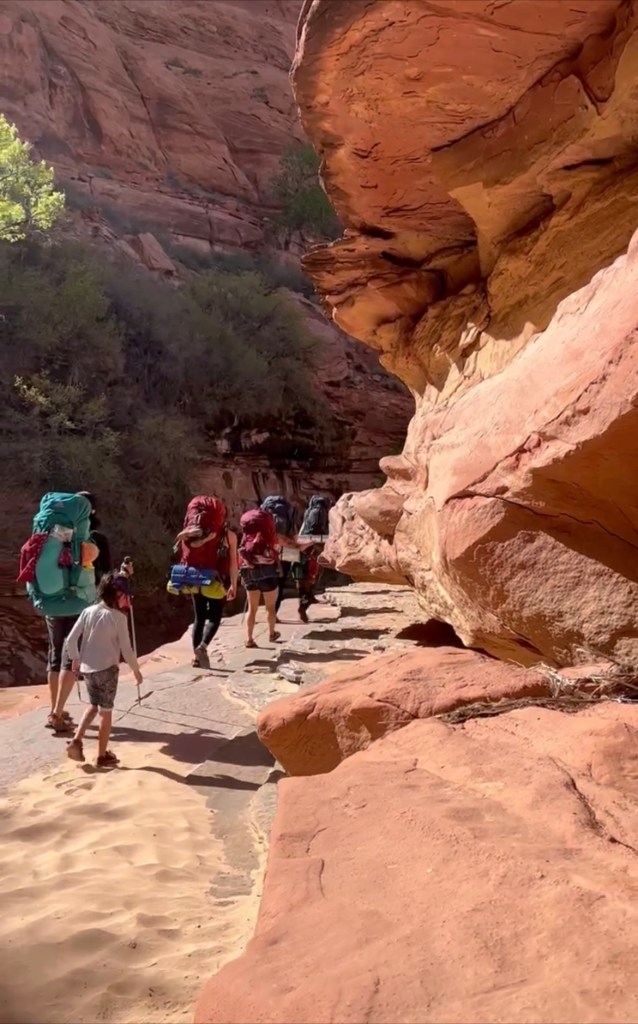
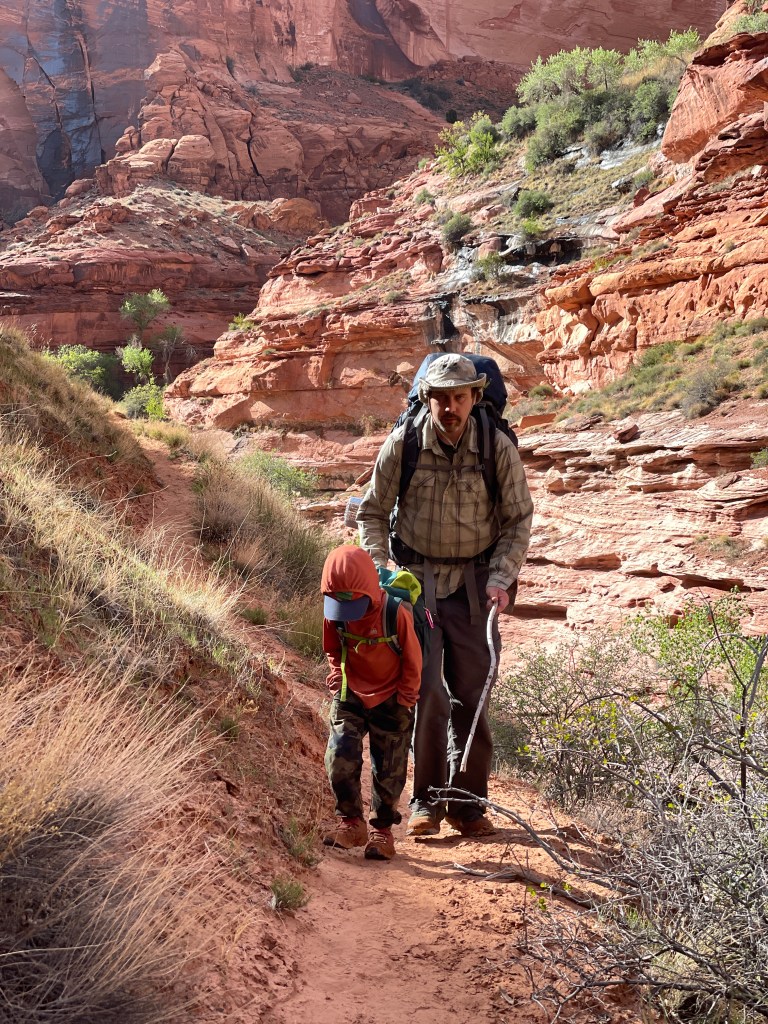
Day two we made our way towards the crack exit. There were a lot of great spots to check out along the way. Just a warning. Don’t let the mileage fool you. I have done a thru hike where I covered over 20 miles on multiple days, but this terrain hits different. I ALWAYS think to myself it’s short and sweet, but when I do it it always feels tremendously longer. You’ll have route finding, multiple river crossings, several points of interest and obstacles. These will all slow you way down. Our kids went adult pace and it still took us a lot longer than anticipated. I feel the mileage from Jacob Hamblin Arch to Coyote Arch is fast moving. The trail is easily seen. You’ll have river crossings, but you’ll spend a lot of time up on dry ground short cutting across these sandy benches. From Jacob Hamblin to Coyote Arch you’ll also pass Swiss Cheese Falls.

Swiss Cheese Falls
Coyote Arch

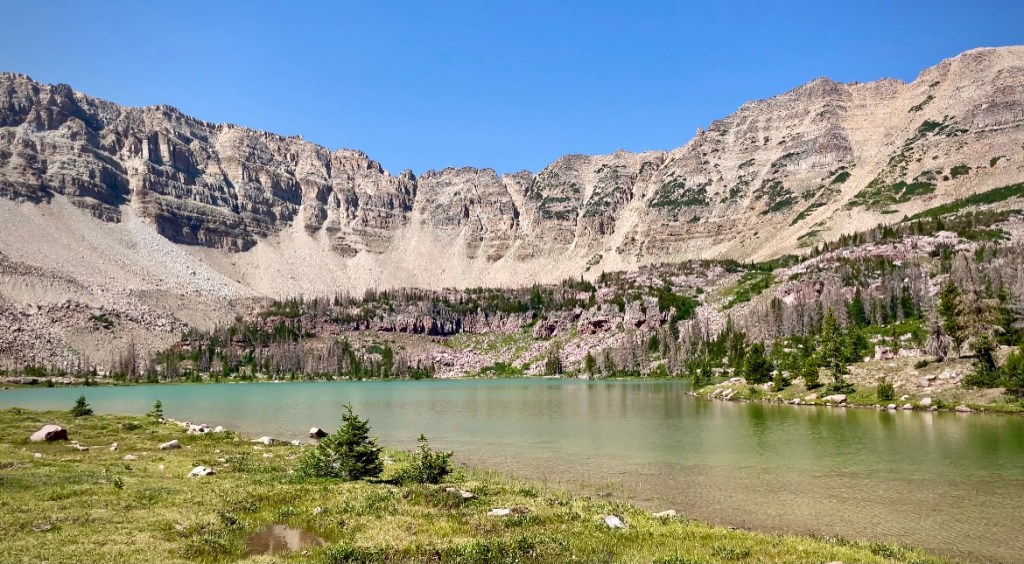
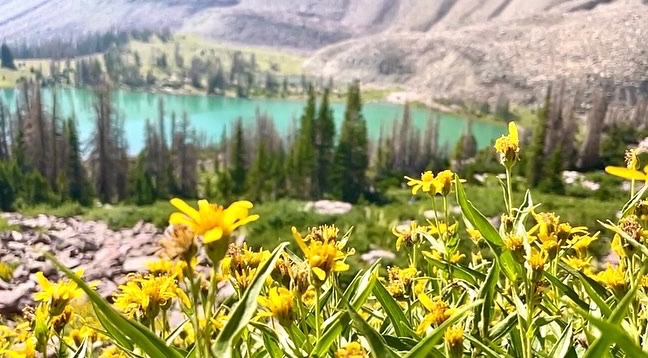
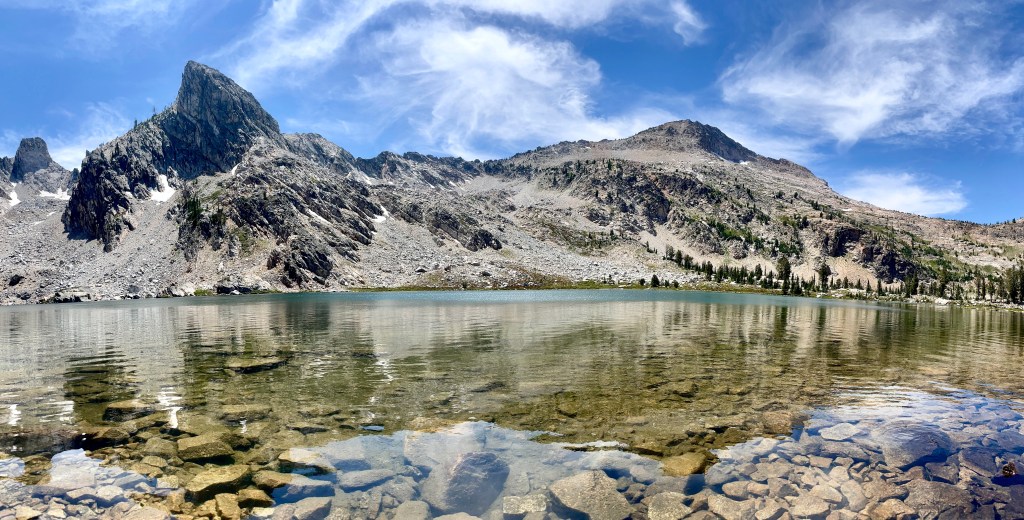
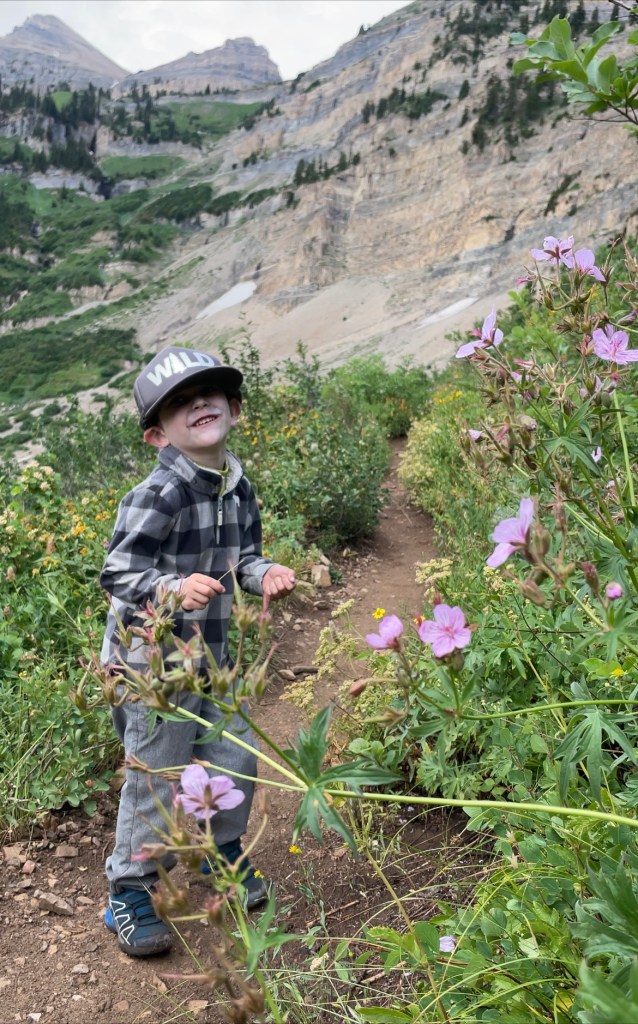
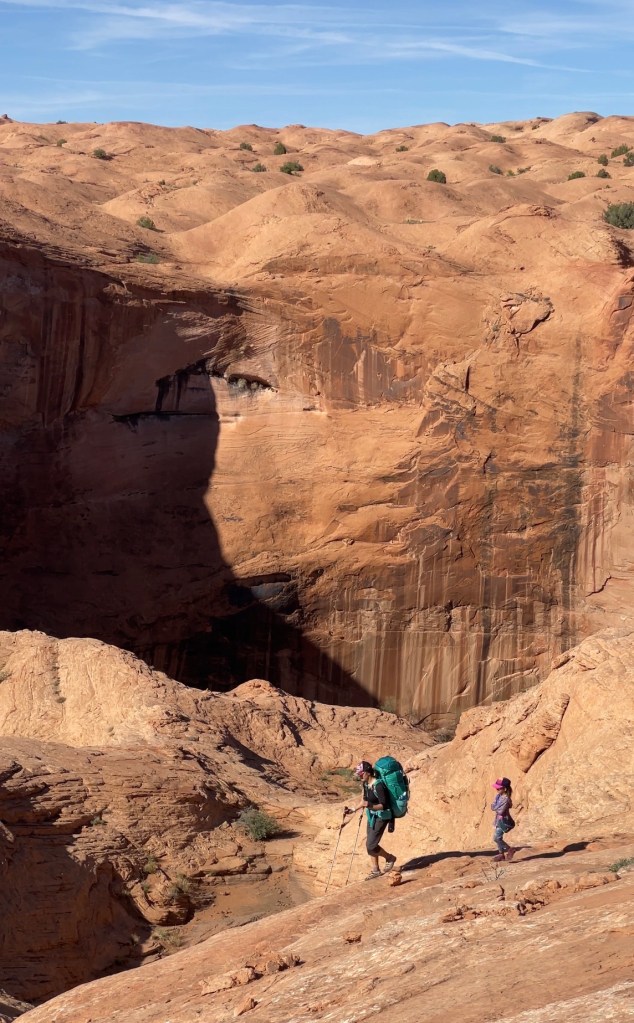
Coyote Arch to Cliff Arch is where you’ll start slowing down w pace. It’s usually pretty schwacky in areas and the trail isn’t always easily identifiable leaving you burning time walking through the river. It’s also hot in this portion too. This is my least favorite section. It has a lot of big group camp sites, but I’ve never seen anyone at them. Right before the waterfall by Cliff Arch there’s an old rock slide you’ll navigate through. It’s easier if you remain left and high. You can get there either way though.

Route Finding

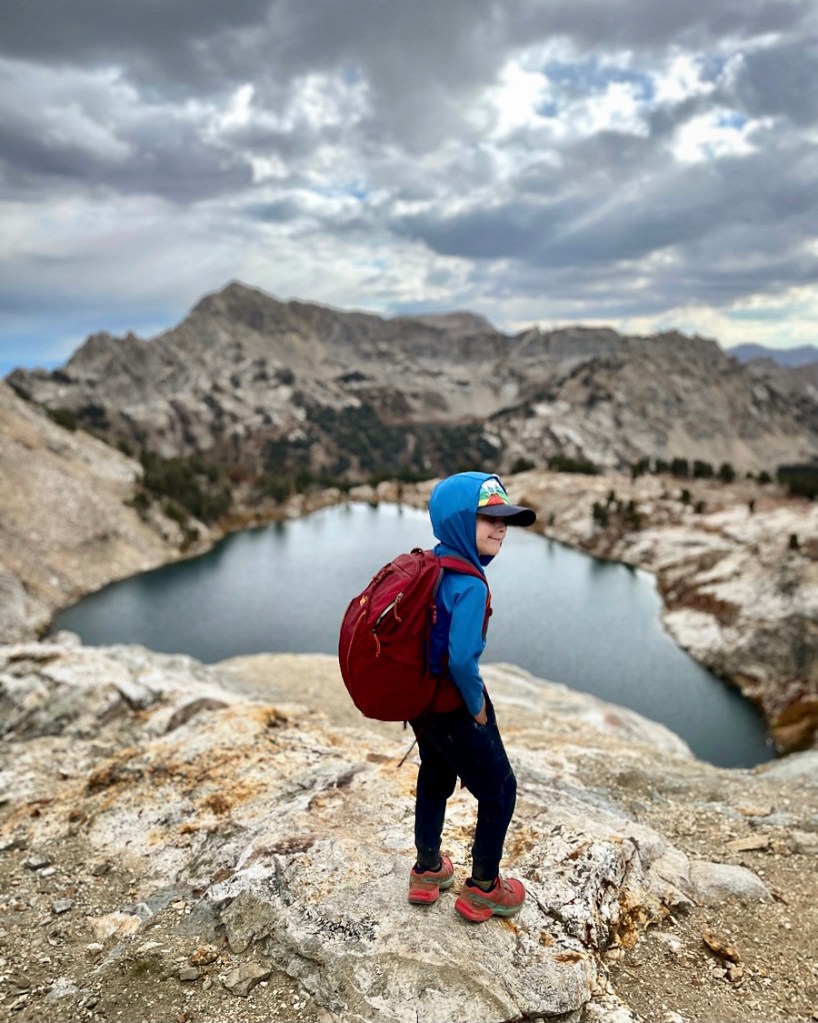
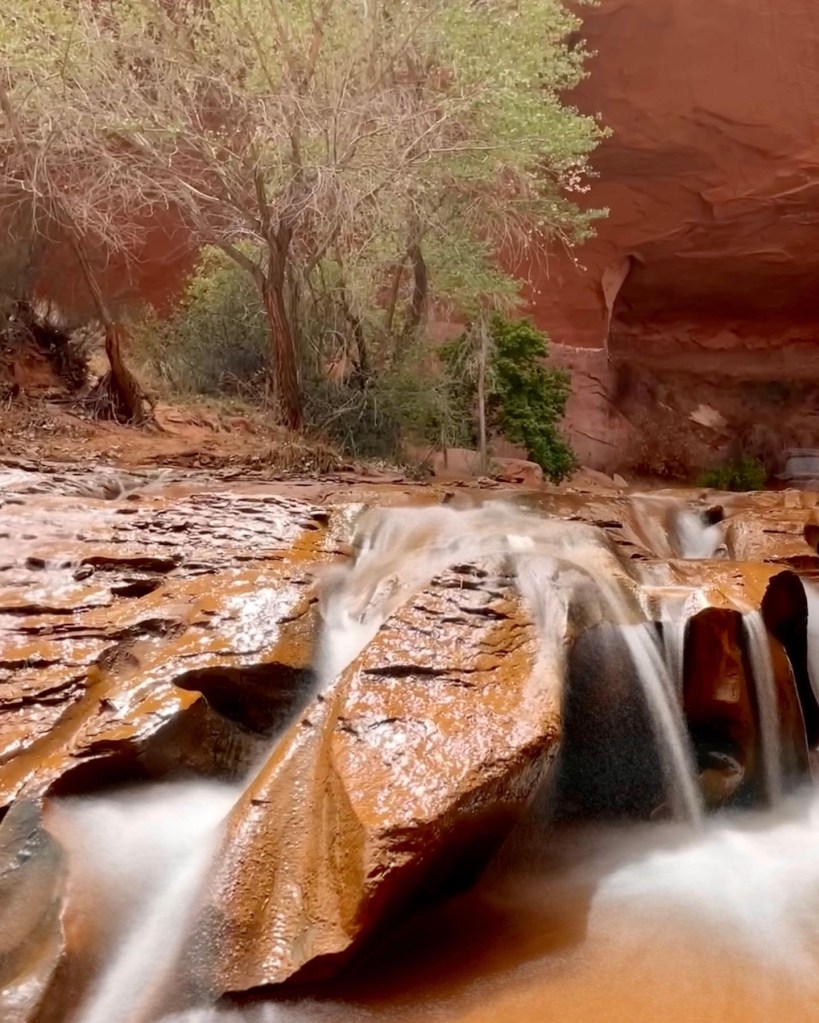
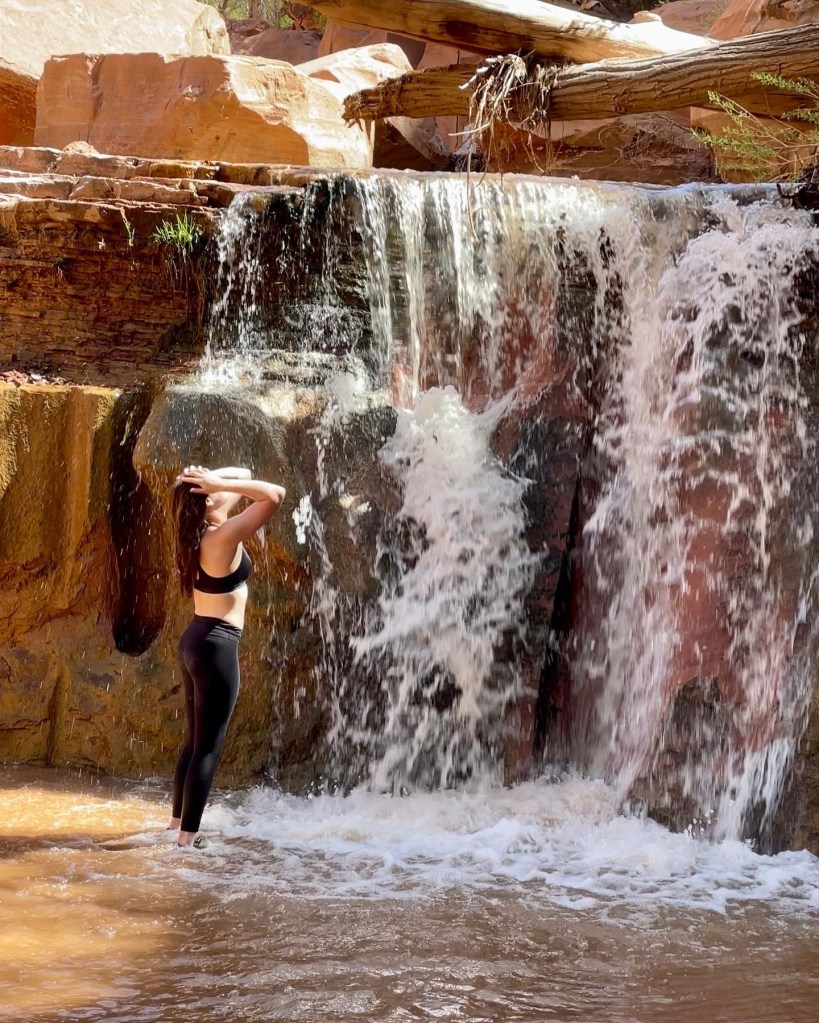
The falls below Cliff Arch is a welcomed breaking point. It’s usually shallow water making it the perfect place to cool off and for kids to play. Beyond this point you’ll start hitting waterfall after waterfall, but it will no longer be kid friendly for most children. It has slippery down climbs and some decent exposure. The canyon is pretty open as well. Not even a quarter mile from this waterfall is a beautiful alcove with a nice sized campsite across the river. We all wanted to stop and camp here, but needed to push further in order to climb out of crack first thing in the morning. There isn’t another large group site until where you’ll exit to climb crack in the wall.

Waterfall by Cliff Arch

The next push after Cliff Arch was to another waterfall not too far away. I’d say maybe a half mile. There is a down climb and going starts to get really slow from here on out. You’ll traverse over several rock ledges and climb a steep narrow trail w a lot of exposure to one side. After you’ve walked this trail you’ll have to down climb a pretty decent amount. There are a few cairn stones to follow. So keep your eyes peeled or it will feel like you got cliffed out.

Second Waterfall After Cliff Arch
Narrow Ledge
Narrow Portion of Trail. You’re High Up Here.

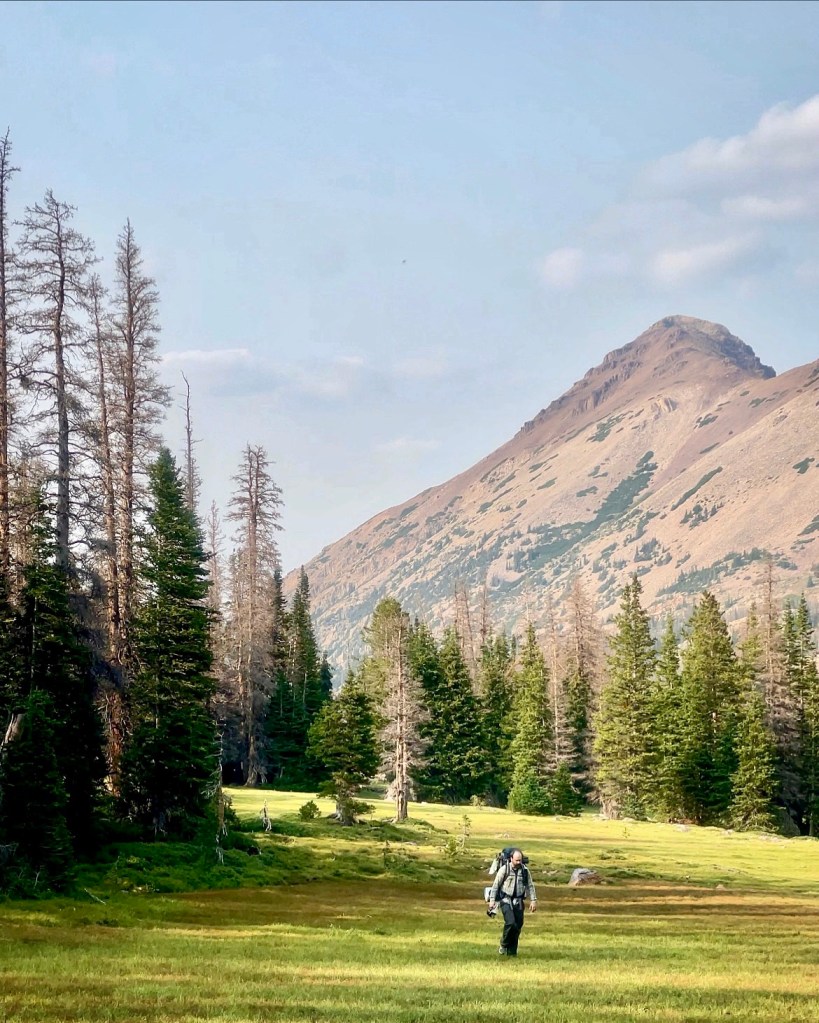
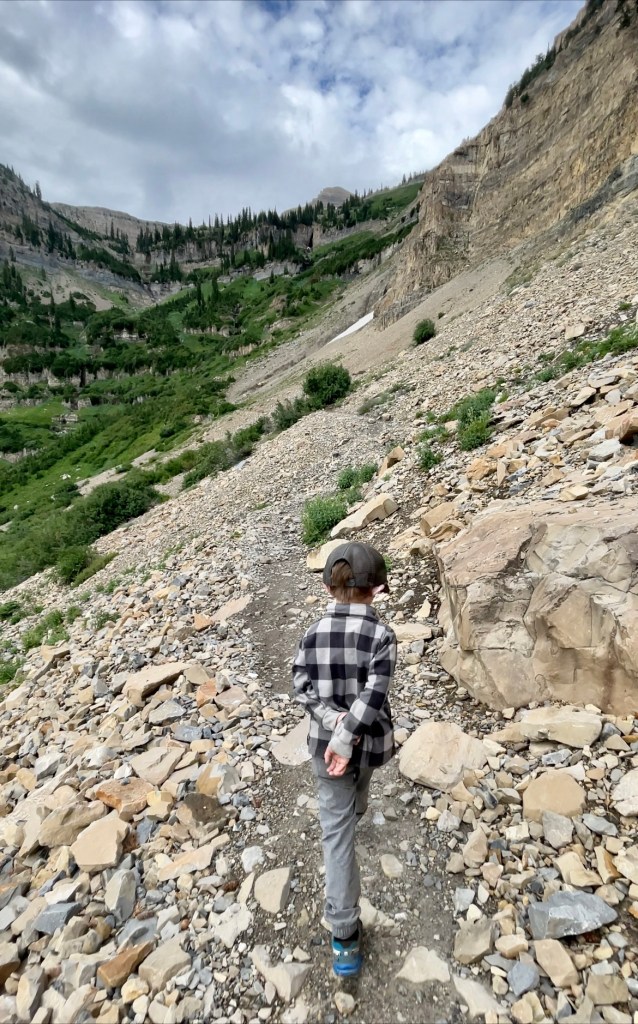
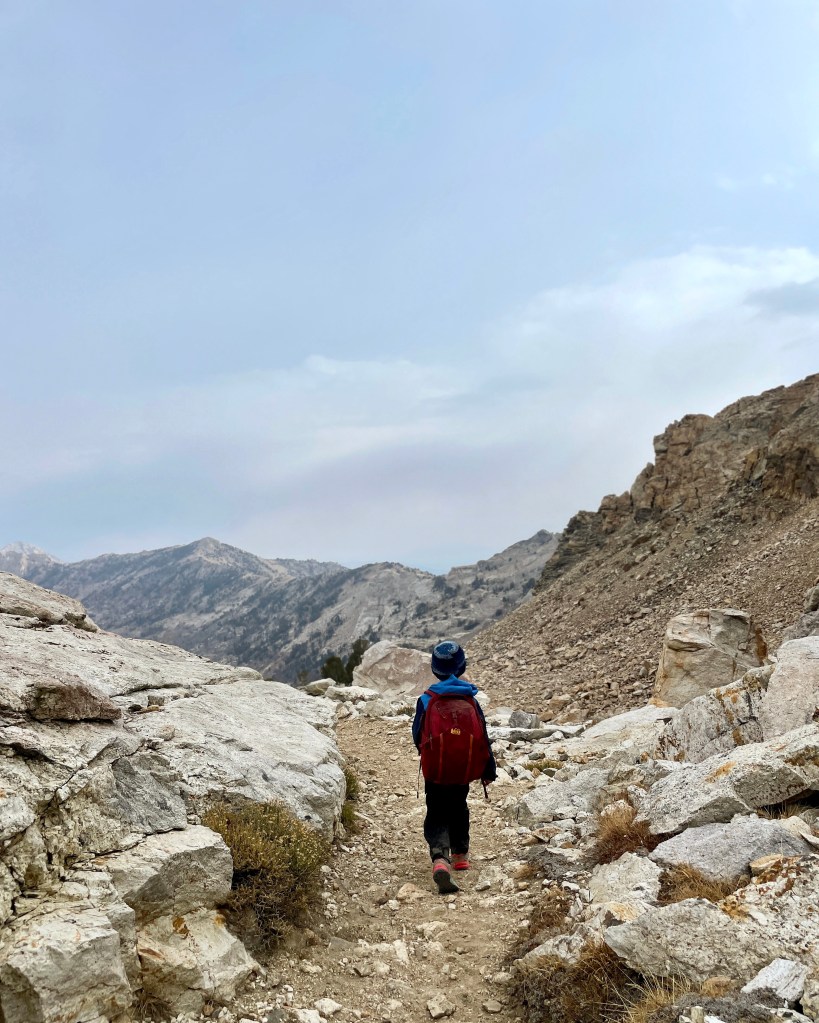
Now all the hard stuff on the canyon floor is behind you. All that’s left is ascending 800 feet in three quarters of a mile up a sand dune. Fun times! We got an early start. It was still pretty cold as we climbed. This climb is the reason why people go in crack and out sneaker. I personally didn’t think it was terrible, but in the heat I might of been singing a different tune.

Ascending To Crack In The Wall

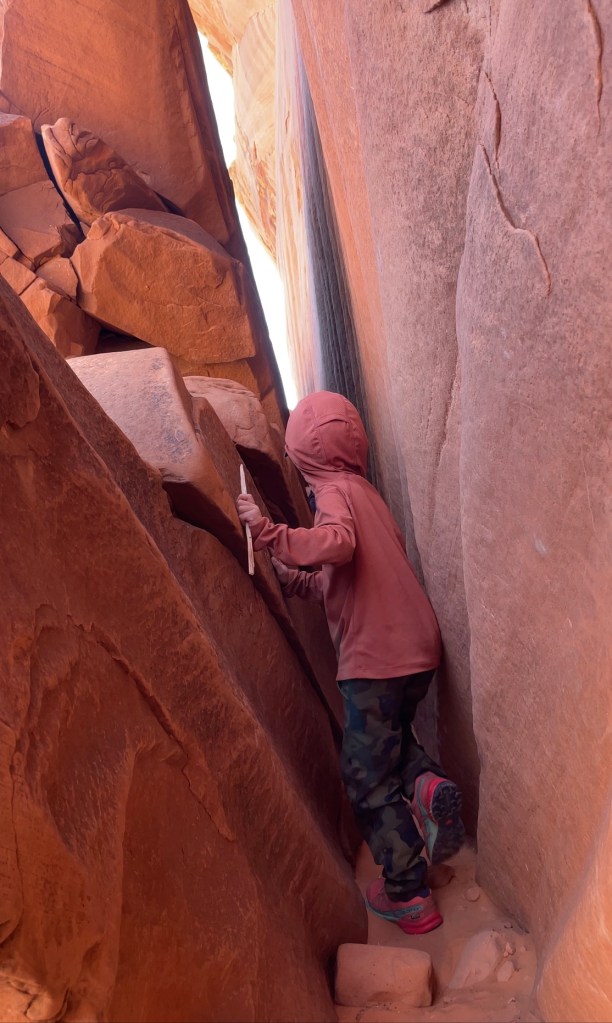
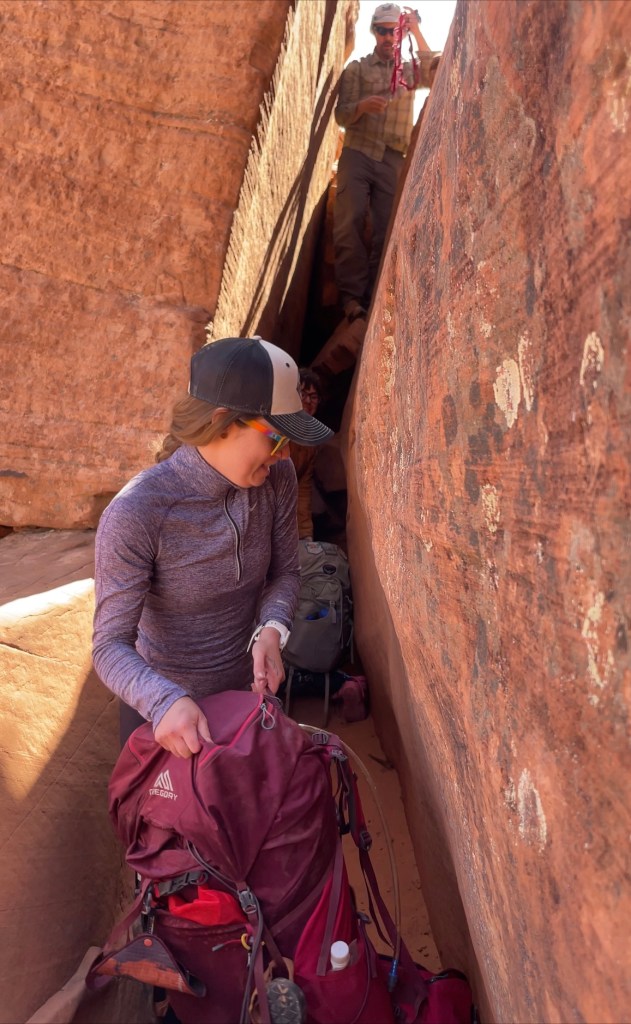
Finding the crack if you’ve never been there before requires gps. It doesn’t look like anything, but a sheer cliff face at first glance. The crack is narrow and you might question if it’s the right way. It is. There will be two spots you have to pull bags up at. We just used a daisy chain for this. A rope is overkill. Only one group can go through at a time. So be patient with others. There is no where to squeeze past once you start.

Crack in The Wall
Second Spot to Pull Bags Up

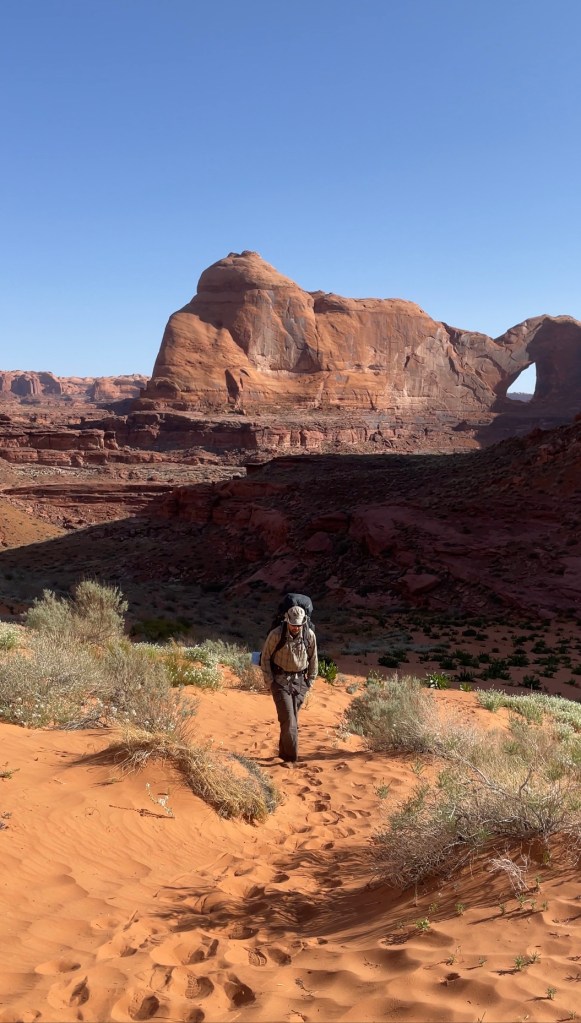
Once your group makes it out of the crack you’ll be on slick rock. The cairns are easy to follow until you get to the sand. If it’s been windy there won’t be any footprints. We all had to use gps here. The walk to Forty Mile TH is brutal. Add a road walk or connect through the desert if you weren’t able to go past Jacob Hamblin TH due to sand. I burned a whole liter of water in 30 minutes above the rim. It’s miserably hot. Anything above rim or the dune coming out of crack is best done in the cool of the morning or evening. Have fun, LNT and stay hydrated. Happy hiking.

Backpacking to South Willow Lake in the Stansbury Range.

Not to start out on the wrong foot, but this lake photographs better than it looks in real life. The lake is incredibly photogenic. It’ll catfish you into paying it a visit. My sister and I also renamed this Lake. We call it Horse Poop Lake. It’s a great place for Horses to hang out and poop. We will get to that soon enough though. I have been really spoiled with so many great places to backpack in Northern Utah that my expectations might need to be adjusted. But if we are going to grade on a curve this would get a B minus. If there wasn’t so much horse poop I’d give it a B+.

South Willow Lake

We started from the Deseret Peak TH at the end of South Willow Canyon. You’re going to be hiking through Aspens starting out. There is shade too. So, that’s a bonus. You’ll later come to a stream crossing. You will cross the stream and follow the trail to the left. After this just keep your eyes peeled for a trail split. You’ll go to the right and you most likely won’t see another person from this point on. Sections of trail get steep in this area. There will be trail splits here and there, but everything is well signed. I still always recommend mapping out your course prior to any trip that isn’t familiar. When you’re physically or mentally exhausted you tend to miss things. Things get more confusing. I’m not so much going to give a play by play w landmarks and trail splits since GPS can guide you, but instead I prefer to give in depth details of what to expect from a trail.

The first climb is steep and loose. Poles help going up and down this section. You gain just under 2k feet elevation over the span of 4 miles. Which if I was to read the stats alone I’d be like “that sounds great”! Desolation Lake is a continuous climb with those same stats, but South Willow is more steep climb, long mellow flats, steep, flat, down and more climbing. This first section of climbing is the steepest portion. The switchbacks are also steeper. The rest isn’t bad. When you reach the switchbacks take a break if needed. Since the trail is so thin up the switchbacks there isn’t any great place to break. None. You won’t climb for eternity, but you’ll need to just slowly and steadily push through this section. Usually there are wildflowers that crowd this portion of the mountain side and you have a phenomenal view of Deseret Peak. I felt this was the most beautiful portion of the hike. I also helicoptered my child since the trail is thin and the drop offs high. You could avoid this section if heights make you dizzy. There are a couple different ways to the Lake. For the alternative route check out Girl on a Hikes blog. I just felt this way offered more in terms of views. That is why I chose this route vs hers.

On the Switchbacks

After you reach the top of the switchbacks there is a large flat shaded area that is perfect to break if needed. If not it’ll be pretty flat for the most part until a small descent through some trees. The trail is a thin ribbon of goodness that wraps itself around the mountain side and offers up some sweeping views to the East. Once you get to the trees there are some blow downs you’ll have to maneuver. After the large flat spot past the switchbacks there isn’t a great place to break until you descend past the trees. Good thing to keep in mind.

After you finish your descent there are a few campsites you’ll come across. You’re not far from the lake now. If you look to the West you’ll be able to see the cirque that the lake is nestled into. You still have a few hundred feet of climbing to the lake or to be able to see the lake. It’s not as nasty of a climb like the first steep section or the switchbacks. It is however completely exposed to the sun, so with kids we ended up taking more breaks than we usually do. It took us about 4 and a half hours to complete the hike. This included three breaks. You will have a few small stream crossings after the first large river crossing. You might be able to get away w carrying less water. We brought our dogs so it was nice to have water sources throughout the hike.

Final Climb

When you reach the lake you’ll be suprised how small it looks compared to pics. The cirque is beautiful and there were a few campsites to chose from. The one at the top of a hill overlooking the lake offers the best views, but is pretty rocky and uneven. So we opted for one of the other three. We climbed the hill to the East to camp. The problem w the other three campsites are that there is horse poop everywhere. When I mean everywhere, I mean everywhere!!! It’s unavoidable. We had to prep our campsite by clearing poop up. The site closer to the lake was not campable unless you had a shovel to clear all the wet manure. I think a day hike to the lake would be more enjoyable than camping here because of all the poop. I’m not being dramatic either. I do wish I would’ve known this. I had been wanting to visit South Willow Lake for a few years. Different choices would’ve been made or I would’ve set up below the lake and just hiked to the lake separately. It looks like others have done this. I couldn’t understand why someone would camp below when there were campsites above. Now I understand.

Our Campsite

It also gets pretty chilly and windy in the bowl the lake sits in. For more mild temps the campsites below would’ve been a better option. Once we fell into the shadows of the late afternoon it was cold enough that the kids didn’t want to be outside our tents.

My sister and I did bring our dogs on this trip. When backpacking with my dog I like to have her wear a pack. I don’t load her pack. The pack is for poop bags. I have her carry her plastic dog poop bags and her waste. I don’t want her poop stanking up my bag. Sometimes I have her carry her food too. Please pick up after your pet on trail. I’ve seen trails that were dog friendly lose their privileges due to owner negligence. Fortunately a lot of backpacking trails in Utah you’re not required to get a permit. I do fear with overuse and individuals not picking up after themselves that this will start slowly changing.

The Stansbury Mountains are a great range to escape the crowds of the Wasatch. I’ve only ever seen a couple people here and there when exploring this range. The proximity from Salt Lake detours most hikers. It’s not too far, but when you think of the hundreds of trails less than 20 minutes from Salt Lake the hour and a half drive to the trailhead loses a lot of appeal. I highly recommend hiking Deseret Peak if you’re in the area and want a lengthier day. Happy adventuring!

5 Easy Kid Friendly Backpacking trips in the High Uintas.

ALL TRAILS ARE UNDER 2 MILES ONE WAY.

Whether your child is two or eight these 5 spots will give you a taste of that sweet backpacking life. My first backpacking trips started off 2 miles or under. I wanted to slowly build my child’s mileage up over time before we started covering longer distances. These trips brought me no less joy than than some of our double digit days we do now. It also gave me time to figure out my ish. When I started backpacking my friends and I would go together with our kids during the week without our spouses. It’s good for everyone to start out your first few trips easy peasy. I promise you will pack your fears your first few trips. By doing easy trips to start out you can become familiar with what items you felt were important, but just don’t use. Every item weighs you down. When my friends and I started to get into backpacking we searched blogs for how to backpack with kids. We found plenty of sites, but I found nothing about how to do it without another persons help. Nothing. Zero. Zilch. So keeping it short at first allowed us to gain confidence and expirement while still being able to bail to the car if needed. Here are some trails you can do just that while you get your backpacking legs under you or just wanting an easy track for little legs. I feel any child that can walk without falling down can do these trails. These trails are perfect for your little adventure buddy in training.

FEHR LAKE

There have been times where I’ve just needed to get my teens away from their screens or I have wanted to backpack, but too am too tired to do much. Fehr Lake is my go to for when I want to feel like I’m in the backcountry, but don’t have the energy for much of anything. This trail would be an ideal first time backpacking trip with young kids. If they can walk, they can make it to Fehr. It’s 0.4 miles in with 116 feet elevation LOSS. You can continue on to Shephard or Hoover Lake if you desire, but there are plenty of great spots surrounding Fehr Lake. This lake has all the backcountry feels we walk miles upon miles to reach.

Son fishing at sunset at Fehr Lake.

WALL LAKE

Another perfect lake with plenty of campsites that’s an easy stroll from the lot. I’ve camped at Wall Lake quite a few times. It’s a large lake with an area you can cliff dive. It’s not uncommon for families to day hike in tubes and float in the Lake and soak up the sun. It even has a beachy area where kids can play. There are plenty of places to day hike to near Wall Lake. I usually brought my soft carrier when my youngest was small and would day hike and keep Wall as my home base. It’s a short 1 mile hike in with about 116 feet of climbing. Little effort with a big payout.

Wall Lake

KAMAS LAKE

While Kamas doesn’t have the plethora of campsites the other two do it is still an excellent lake to spend time at. I would suggest this for a midweek trip. It’s only a 1.6 mile journey from TH to lake with 513 feet worth of climbing. You’ll pass through forests and a meadow with stunning views of Mt Marsell. The trail is decently shaded and the lake is a show stopper.

Kamas Lake

LOFTY LAKE

This is one of my very favorite lakes in the area. It’s more of climb than the other three. You’ll gain 716 feet in 1.5 miles from the Pass Lake TH. It sits at high elevation and I’ve seen mountain goats in this area. My favorite part of the hike is the view while you’re ascending the pass. You’ll have more solitude at this lake than Kamas. There are some great sites in the tree line to the left of the lake. It’s terrain is trickier for small children. Just hold their hand and they’ll be fine. My three year old crushed this hike.

View from the Pass
Lofty Lake

LONG LAKE

Long Lake is the longest distance squeaking in just under the two mile mark with 293 feet of climbing. This is in my opinion next to Lofty the hardest of the 5 tracks. The trail usually heats up and is pretty dusty. I suggest starting at a good time. My child has done this hike on his own two legs at 2 years old. The sunsets here are wild and the Lake is huge offering plenty of space to spread out and feel isolated from other campers.

Sunset over Long Lake

HONARABLE MENTIONS ALSO UNDER TWO MILES.

  • Cliff Lake
  • Ruth Lake
  • Clyde Lake

Backpacking to Priord Lake in the High Uintas.

This was the HARDEST trip I’ve done with my child. He was 4 years old and it emotionally kicked my trash. I researched the trail, but there wasn’t a ton of beta on it. Girl on A Hikes blog was the only substantial source I could find. While she spells it out well it’s hard to truly process what you’re actually in for. You look at the stats and think it’ll be a breeze. I tracked 10.8 miles from lot to lake w about 1,800 gain. Easy peasy. We’ve done the popular Red Castle a few times as a family which is a longer trail w around the same vert. I thought it would be comparable. I’m glad I read Alicia’s blog before I went so I knew the last mile was off route and required gps navigation. I rarely bring camp shoes which is a whole soap box conversation, but after reaching out to her she did confirm feet were going to be wet. I highly recommend cross referencing her blog as well for this trip. Now to what we experienced.

Priord Lake

The trailhead is off the Mirror Lake highway, down a few forest roads and one requires a high clearance vehicle. The lot is small, but there might be 1 other car there. This TH goes to Allsop Lake as well. Most of the signed entries said people were traveling to Allsop vs Priord. After the trail split we didn’t see anyone for 3 days. There is a $6 fee per night or you can use your National Park Pass. The trail is pretty straight forward and uneventful for the first 4.5 miles. You cross wooden planks, see a cabin and hike in and out of a forest. I didn’t really take any pictures. The trail as I said is uneventful and the views are OK. By OK I mean I’m a spoiled brat who has been treated to a surplus of beautiful scenery.

One of many River Crossings

Around mile 4.5 we are going to start crossing rivers. A lot of river crossings. A lot, a lot. Not fast moving rivers, but rivers that you should just give up trying to keep your feet dry. The faster you accept this the better off mentally you’ll be. The real fun starts when we get to miles upon miles of mud lava. It’s the same as a river crossing. You have all these rocks sticking out of the ground surrounded by deep mud that you have to hop over. You can’t hike on the grass to the side of the trail, because it’s just a huge, wet, boggy mess as well. Excellent! I upped the ante and did this while holding a child’s hand. While it was manageable it slowed us down tremendously. It was painfully slow. We needed to be to camp by 6/6:30pm and we didn’t make it to the TH early since we got a late start. We were now racing the clock. So every mud lava crossing was super frustrating for my Husband and I, but the kidlet was PUMPED. The trail is lava?!? Say whaaaaaa! Next we came to the meadow. A bog disguised as a meadow. Looks like grass. But it’s not grass. Before you know it you’re thigh deep in mud. I did change the kiddo into his keens when approaching the bog. I almost thought he lost one. The mud taketh away, but sometimes it giveth back. But only after 10 minutes of searching for it while your kidlet cries that the mud took his shoe.

Found It!
My reality

Once you get to the springs you’ll be out of bog territory. You still have several mud lava crossings. You will also start climbing after the springs. It’s steep, but short lived. Then you’ll just rollercoaster next to a river. After 8 plus river crossings total…. (I lost count, so I think 8) you will hit a beautiful forested area. It’s green and lush and the hike has a different aesthetic to it. You do start a long climb. My child was exhausted by this point. We’d been hiking all day. During our break he just passed out in my Husband’s arms and took a 40 minute nap. I feel we were within a few miles of Priord at this point, but everyone was done. Not physically (for grown ups), but mentally we were trash. Managing a child is like pacing someone for an ultra marathon. Someone who’s already covered a lot miles before reaching you and needs a nap, but at the same time is facing a DNF if they can’t reach the next checkpoint within a short amount of time. Here is where I accepted our DNF. I felt defeated. This shouldn’t of been this involved. Why didn’t I heed Alicia’s blog warnings? She did touch on the river crossings and bog area. I also read she hiked from the first river crossing to camp in her chacos. I loathe hiking in chacos, tevas etc. Its easier for me to just yolo it in my trail runners and bring camp shoes. Trail runners dry out quickly so they’re dry the next morning. I mostly carried my child across some sections of river and the marshy field. I didn’t want his feet to get wet.

Springs

After his nap we rallied and made our way toward Norice lake. Norice is a mile before Priord. Only catch is is that last mile is off trail. It’s up a really steep trail that isn’t marked so you might end up bushwhacking and find the deer path of a trail on the way down. The meadow at Norice is also pretty soggy. We went during an extreme drought year and still ran into these wet conditions.

Meadow before the Climb

You’ll want to climb the forested hill to the right after you pass Norice swamp. It reminded me more of a large swamp than it did a lake. However the views of the mountains are incredible at Norice. When you get deep into the vast areas of the High Uintas it’s magic. It just requires effort. It’s like miles upon miles of blah, blah, blah, ok you’re worthy, here you go. The famous Highline Trail cuts through the scenic, vast areas of the Uinta Range. It’s spectacular . I can’t even begin to articulate the beauty of the vast areas you hike through on Highline. Areas like this bring me back to my thru hike. So, once we reached the top of the climb every view we were treated to was worth all the suffering to get there. I also feel my perception of the hike is going to be different than say someone who does it without a child. It was a big push for little legs and demanded a lot from both parties. I also wouldn’t consider this a child friendly hike.

Moments from Priord

You’ll find yourself hiking over stone slabs and through the most beautiful meadow before you hit the lake. We camped in the meadow. It was my favorite campsite I’ve ever had the pleasure of camping at. There are sites closer to the lake, but I preferred here. I don’t think you’d ever have to fight for a spot at Priord. The campsites closer to the lake are less exposed and some are tucked into the tree line.

The lake was a short distance from our campsite. When the sun shines on the lake it looks jewel toned. On the other side of the peaks that surround Priord sits the more popular Amethyst Lake.

Priord Lake

I will say it was straight up spooky at night here. I’ve been asked several times when posting my trips on Instagram if I’ve ever experienced weird going ons when backpacking in the Uintas. The Uintas are famous for Bigfoot , UFO and ghost stories. I’ve always laughed it off, because never have I ever experienced any of these things. Don’t be ridiculous. But I gasped awake around 12:30 am and felt a dark feeling that made every hair on the back of my neck stand up and felt there might be an inkling of truth to what others have previously said. I just laid there scared AF thinking I was crazy. A few months later I ran across a post about someone who camped at Priord and heard the sounds of children singing outside their tent. Bah! Could’ve been a coincidence, but there is something odd about Priord.

View from above a Priord Lake

The next morning my Husband thought he saw someone’s jacket laying on a rock above the lake. He pointed it out and sure enough you could see plain as day what appeared to be a black jacket on a rock. We decided to retrieve it. Oddly enough we never found it. There wasn’t even a dark rock. The only thing we found were spiders and great photo opportunities. Still a win, but we thought it was suspicious. Priord Vibes? Maybe. A funny story about the Uintas. There was a guy who I think in the 90’s would dress up as Bigfoot and terrorize the Highline trail area. This went on for quite sometime. While it sounds like a brilliant idea, nowadays you’d get yourself shot. I bet he has some great stories though.

We decided to pack up camp and head four miles down the trail and camp so we didn’t have such a long day the next morning. I didn’t want to do that entire push in one day again. I felt it would be more digestible broken up. On the way down we picked up a faint trail through the forest that would’ve been soooo much easier than bushwhacking uphill as we navigated to the lake. So, even though every source I’ve read has said there is no trail from the steep portion to Priord, there indeed is. It’s right off the bat once you hit the meadow passing Norice. Go up the ascent sooner and make your way over after you complete the climb not before.

If you’ve never been to the Uintas you must know that even if the forecast on multiple sites calls for a zero percent chance of rain you’re chances of experiencing a fast moving storm that produces enough lightening to make you concerned and enough hail to look like a light dusting of snow. I always hike with my rain jacket ready to access in a moments notice. These thunderstorms usually roll through in the afternoon or middle of the night. They don’t ever last very long though. Just always pack rain gear even if you think you might not need it. I love to cross reference Open Summit and NOAA for weather forecasts. You can also use the purple air app to check air quality during wildfire season.

Above Priord searching for things that don’t exist.

That concludes our trip report to Priord Lake. If you love solitude and you don’t mind an obstacle course this is the place for you. Make sure to download GPS. The trail does peter out in sections. Also, follow us on Instagram for more hiking inspo with kids. Just look for Wasatchwildchild. Happy trails everyone.

Backpacking Naturalist Basin in the High Uintas

You’ve probably noticed that my young child joins me on most backpacking trips. Even though he was only 4 years old when we did Naturalist he had no issues with the mileage to Jordan Lake. He usually hikes around 2 mph, but I never count on him doing this mileage every hour. I’ve come to realize being on trail so often with him that this is a best case scenario and that terrain, obstacles, weather and the time of day we start can influence the time it takes us to get from point A to point B. I prefer to do an in depth investigation of any new trail we backpack together so I can manage expectations, time and plan accordingly. Backpacking with kids is more involved and requires thoughtfulness when packing and during prep stages. We planned for mosquitoes and off trail route finding in the upper basin. What we didn’t plan for was 45 blowdowns and our Puggle to call it quits. Here’s an in depth look at our trip to Naturalist Basin. Did I mention I fell in a lake filtering water with my backpack on? Mmmm, yeah. So, maybe there are a few lessons in here as well.

Looking Down On Morat Lakes

Mosquito season hit early with unusually warm temps and rapid snow melt. We soaked our clothes in permethrin before the trip and brought headnets. I also bought a cheap mesh enclosure that could fit multiple people in. You simply hang it from a tree and you can enjoy being outside your tent watching the sunset without being bombarded by bugs. It didn’t even weigh half a pound. We had originally planned to spend 4 days in the basin, but cut it to 3. I highly recommend not camping at Jordan lake unless your sole purpose is fishing. Jordan has great fishing and one huge campsite where we set up. It’s windier and more exposed once you climb into the upper basin, but the areas in the Uintas that are known to be windier are also your best bet in the thick of mosquito season. I think it’s prettier too in the upper basin. I am a fan of vast areas with sweeping views and the upper basin provides just that.

Jordan Lake

The trailhead to Naturalist starts at the Western Terminus of the Highline Trail. It’s located just off Mirror Lake Highway. There is a six dollar fee per day for parking or you can use your National Park Pass. The parking lot is huge and has a bathroom. I tracked 6.7 miles w 850 feet of vertical climb to Jordan Lake. It took us 6 hours and 11 minutes. I’d planned for 4, but a lot of the blowdowns required us to lift our children and animals over several large trees. This was a major time suck. I remember when completing the Highline trail last year that this final leg had a lot of blowdowns, but assumed they had been removed by this point. I assumed wrong.

Starting out on Highline you’ll descend the first mile. This is a hot, dusty portion of trail. You’ll also pass through a burn scar area as the trail gently rollercoasters. The burn scar area is neat to see. You have juxtaposition of the chared trees set against a green forest floor. Life and death collide.

Burn Scar Area

Around mile 4.5 be on the lookout for a sign that’s not well placed to catch your eye on the left hand side of the trail for Naturalist Basin. Better yet have the route downloaded and keep an eye on how close you are to the turn off. Nothing is worse than backtracking with a child. The water sources to the basin I feel aren’t quite enough to get away with carrying my Katadyn soft flask filter vs my bladder. The carnage of blowdowns continue once you take the trail split. It was 45 total from the TH to Jordan. I know, I counted.

More Blowdowns

Once you hit the split the trail gets steep and climbs for a short distance and then levels out. Rinse, repeat, rinse, repeat. You do this until the trail split that leads to either Jordan lake or Morat Lakes. At the split you’ll see what looks like a stepping stone path across a river going to Jordan lake or you’ll begin another climb if you go left to Morat Lakes. It had taken us tremendously more time than we had planned for so we opted to head to Jordan so the kids could have a break and play vs climbing to Morat.

Crossing the River to Jordan Lake

The next morning we woke up and decided to day trip around the basin and hit all the lakes. If I would’ve known I would’ve packed us up and relocated in the upper basin to get away from the mosquitos. The trail to the upper basin wraps around Jordan Lake to the East where you’ll find a steep, loose AF, short climb. This is where you’ll need GPS. There aren’t trails in the majority of the upper basin. Everything from here on out is route finding. To make a loop I tracked 4.98 miles w just under 700 feet vertical gain. The trail isn’t hard because it’s steep. It’s hard because of navigating, bushwhacking and boulder field crossings.

One of the many Boulder Fields

The first lake we visited was Shaler. Shaler was my favorite Lake. There were some great campsites too. We didn’t rush this day hike. We made it a point to stop and enjoy every single lake. We also were avoiding our problems back at camp. Those problems being the swarm of bloodthirsty mosquitos.

Shaler Lake

After Shaler we visited Faxon. Faxon is a smaller lake than Shaler. The Jack Russell enjoyed a dip in the lake. The Puggle enjoyed sun bathing and the kids loved looking at all the delicate yellow flowers that freckled the grassy areas.

Faxon Lake

From there we popped over to Leconte. This is where I feel the majority of the boulder fields and bushwhacking were. Everything short lived. Nothing too hard. The boulder fields do require balance to cross. I wouldn’t say that anything was too difficult. I just made a mental note if I bring the kid back up to allot for more time with the terrain.

LeConte Lake

LeConte was rather large. We didn’t see a soul from Jordan until Blue Lake. Most people prefer to camp in less exposed areas. Which if storms were forecasted to roll through regularly on a trip I’d probably prefer not to be as exposed either. Since there isn’t a trail this could cut down on crowds as well. Our next stop was Walcott Lake. More pond status than lake, but man was it different. I highly recommend stopping by vs bypassing it on your way to Blue Lake. It just has a unique feel.

Walcott Lake

Finally on to Blue Lake. Jordan and Blue Lake are the most talked about lakes in the Basin. Blue lake was indeed blue and it was fairly large. We ran into a few people fishing in the area. It does have tree cover in areas so if you want to be higher up in the basin, but have some tree coverage Blue Lake is your best best. The fishing from what we heard was better at Jordan.

Blue Lake

A trail pics up from Blue Lake and descends down a steep, loose, dirt, screeville track. You pass a beautiful waterfall and have the contrasting colors of Morat Lakes pop into view. You have to traverse a gross area that I had no intention doing w a child to get the best picture of the falls. Sorry, no pic. Morat Lakes are another popular campsite destination in the basin. So Jordan, Blue and Morat is where most people are going to set up camp. I’d camp at Blue over Jordan or Morat.

My sister and niece descending to Morat Lakes

Once you leave Morat you’ll descend to the stream with the stepping stones. We then made our way back to camp and were driven mad by the bugs. I could 100 % spend the rest of the night relaxing and playing a game w my Husband or friend inside a tent, but a 4 year old needs a little more. Sometimes I do bring games for us to play or I have been known to preload my phone with games for him. Situations like this it comes in clutch. As for the dogs they were happy to spend the rest of the night relaxing. There was also a small waterfall on the North side of the lake you can hike up to. That was our night.

Doggos Relaxing

In case you’re wondering the dogs are showcasing their homemade sleeping bags. For their sleep set up I have an accordion style Z lite pad that they sleep on. Then I bought some cheap down kids coats from a thrift store and cut the arms out and made the holes big enough to comfortably fit their legs. I then bought an Eddie Bauer packable down blanket and cut it to size. It should be long enough on both sides to cover the majority of their legs, but not hit the ground. Then I cut it off before their tail. I put Velcro on two places and have it so the blanket portion can be taken on and off of them with the velcro attachments. When they lay down the blanket covers their body.

The next day the Puggle decided not only would she refuse to maneuver blow downs, cross rivers or boulder fields she would also refuse to walk the last two miles back to the car. My Husband fireman carried her home. She is an old girl and we lost her to cancer 4 months later. This was the last trip we took her on and I’m grateful for the memories I had with this sweet girl. RIP my beautiful soul puppy.

One last thing. About me falling in the lake. When you filter water and have to reach down from a rock to do so remove your pack. Especially if your sisters dog’s trail name is freight train and has a habit of plowing into people. Freight Train came barreling up to me curious as to what was going on and knocked me right into the lake. Pack and all. My Katadyn filter was never the same. Another pro tip if using the Katadyn Be Free is to take a coffe filter and wrap it around the filter. Secure filter with a rubber band or pony tail. Katadyn IMO gets clogged easily. Once clogged it’s worthless. No matter how hard you try to shake that bad boy or how long you soak it in distilled water it’s done. After I switched to the Sawyer Squeeze with a smartwater bottle. Much harder to legitimately clog and cleans more efficiently. I do however miss the soft flask that attaches to the Katadyn.

Waterfall across from Jordan Lake

Happy trails everyone!

Backpacking Alice and Twin Lakes in the Sawtooth Range

Honestly, this trip was supposed to be the Alice/Toxaway Loop. From the title you can gather that a loop trip did not manifest into fruition. I spent a good amount of time researching it and gathering every single detail I could find. It’s important I know everything I can about a trail when taking a small child on a long multi day trip. This trail came highly recommended by several people. I loved that it was a loop so you get more views. I loved it was adjacent to a water source so I could cut down on water weight and I loved all the pretty curated Instagram photos I saw. I can confirm the mosquitos could carry away a small child. I can confirm there are several river crossings, but it was a bad snow year so some rock hopping allowed us to keep our feet dry. I built it up in my mind to be THE trip of the summer. It was a trip alright.

Sunrise at Alice Lake

We drove 6 1/2 hours to the Tin Cup trailhead. It was a balmy 88 degrees as we arrived around lunchtime. There are several lessons to be learned from this trip so I will share these lessons with you as we go. The first is starting out after noon and having a time crunch to Alice Lake. The climb to Alice was 7.5 miles to our campsite. The parking lot was almost full on a Tuesday and you do need permits, but they are self issued at a register 1.5 miles in. If I were to do this again and arrived around noon I would of started the loop in the opposite direction making Farley or Toxaway our first stop. Farley is over two miles shorter. Now if I was kidless the 7.5 miles wouldn’t seem like a time crunch, but have you ever rushed a 4 year old? You don’t. I already went into this knowing it was going to be a push. He can move at a decent 2 mph pace, but factors like them falling asleep before the trailhead or it being hot can slow things down. You always have to budget fudge time in and make sure you have some sort of motivator like their favorite candy to ration out to them.

Switchbacks to Alice

Everything before the switchbacks is pretty flat. You pass Petitt lake and then wander through the pines before you start your climb up the switchbacks. The switchbacks are an enjoyable climb, but are exposed with granite surrounding you. The heat radiates back up at you from the rocks making you real toasty on an already hot day. Another case for starting the trail early or from the other direction. This is the section that bodies line the side of the trail in shady areas. Where you can hear backpackers giving others pep talks. Heat can zap performance while hiking. Couple that with not staying hydrated and your trip can go off the rails. I keep salt tabs that I dispense to myself and the kidlet while backpacking. It helps with dehydration, cramping and fatigue. These are an essential item when I do trail races and they translate beautifully when backpacking. You can find them at REI or your local running store. The skratch labs strawberry lemonade drink mixes are tasty and help kick it up to high gear as well. When backpacking I find I sweat a lot and if I’m not getting enough salt and sodium I bonk.

El Capitan before Alice Lake

I felt the it was a pretty hike up until El Capitan, but you don’t get the quintessential backcountry Sawtooth feels until you clear the switchbacks. This is where the magic starts to happen. Where I started getting excited, but also nervous. I was seeing big crowds on trail. A lot of them wearing backpacks. Since we started so late I was nervous we might have a hard time finding a campsite.

There are a lot of campsites around Alice. A lot. But there are also a ton of people. I haven’t ever experienced huge weekday crowds like this. Especially when the hike is over 7 miles. It’s a mild 1,518 feet of climbing. So, that might play into it. Or maybe Alice and her beauty is known far and wide. She lives up to the hype. I however did notice how trashed it was around the lake. It blew my mind. Garbage everywhere. Toilet paper, eggshells, sunflower seeds strewn about and orange peels thrown in the lake. It wasn’t just our campsite. It was everywhere. It broke my heart to see such a delightful and captivating area disrespected. I did take some trash and packed it out. You should always pack out your toilet paper. This was probably the biggest ick leave no trace principle in concept. Who wants to carry out their poopy TP? I’ve honestly found if I’ve put a gallon ziplock bag inside a dry bag and use that for my wet trash and TP that I’ve never smelt a smelly kind of smell coming from my trash bag. For women a KULA Cloth cuts down on TP when going Pee. If you don’t know what a KULA Cloth is I highly recommend googling it. Game changer!

The next day we planned a short relocation to Twin Lakes. I’ve heard no one camps there. It was meant to be a morale building day for the kids after they rocked the hike in with zero complaints. Twin Lakes is a short climb from Alice. You gain a measly 228 feet in the space of 1.63 miles. I found a lot of people do indeed camp there. We did find a great campsite and met some of our neighbors. Which they probably heard our kids play their strange game of Mountain Hospital all afternoon. What is Mountain Hospital? It’s where the figurines we brought the kids to play with hike up a mountain and fall off. If that’s not morbid enough a rescue team will go out and retrieve the injured and take them to the hospital to get better. Our kids might be delightfully strange and unusual, but they also might make a great SAR team member one day.

Twin Lakes

By the end of the night we decided the kids were fine and didn’t need another morale building day. We’d hike to Farley tomorrow and then hike out the next. However in the early morning I woke up to the sound of light sporadic rain coupled with an intense smell of smoke. Was ash falling from the sky?!?! I jumped from my tent to witness that there was a big problem. We were socked in by thick smoke and had no idea where the smoke was coming from, but it had to be in the vicinity. I knew immediately we’d have to evacuate. I had been looking forward to climbing the pass between Twin and Toxaway Lake. I secretly hoped we had to go that way. I woke up the grown ups and they agreed to start packing and asked me to climb the pass real quick and report back which way we needed to go. I also used my garmin inreach to contact a friend and ask her to search where the fire was. I climbed the pass and sure enough Toxaway direction looked worse. I shuffled back down as the text from my friend came through the garmin. There was a small fire on the Toxaway side of the loop. Although it was contained shortly after it started the air was burning our nostrils as we breathed in. It was time to pull the plug and gtfo. The loop I had planned all winter and spent countless hours prepping the kidlets for was kiboshed. I can’t tell you how much this hurt. The silver lining is the Sawtooths didn’t burn that day. That would’ve been devastating.

Twin Lakes
Heading Back

My pack and my feelings were hurting that day. I’ve never not finished a backpacking route. This wouldn’t be my only unfinished trip of the year either. Both not because of the child.

Much Different View of El Capitan

As we walked past Alice Lake and peoples campsites you could see them furiously packing up and coughing. There were still people coming up trail and the ranger at the bottom was more concerned w off leash dogs than air quality. I later posted the pic of twin lakes on a local Idaho FB page about the current condition and I was suprised by the responses I got. A little smoke is no match for Idahoans. I had races this summer so lung capacity was important to me, I was also concerned with the kiddos lungs. Essence of campfire was thick in the air and I already had a headache from breathing it in. Goodbye Sawtooths. Hello unfinished business. I did learn that the Sawtooths are famous for smoke rolling through from California wild fires. Purple Air is a free app you can download to look at air conditions before you go. I usually plan two trips. It was this or Winds. If I would’ve known about purple air we would’ve done Winds instead. But, you live and learn. Am I right?

One last piece of information would be to watch your pack. The rodents are brave and aggressive. My sister left some snacks in a pocket near her waist belt while she set up her tent. It was chewed through within minutes. Get to camp. Get all food and smelly items out of your pack and secure them.

My overall opinion of the Sawtooths is that the more popular areas like Alice Lake are overly crowded and trashed. On my FB groups I would always be suprised by how much hate was expressed with out of staters coming to the Sawtooths and trashing the place. Y’all what I saw was a group effort!!!!! You can’t just blame it on out of staters. But while traveling especially in different states it’s really important to act like we are visiting someone else’s home. Treat the place with respect and pick up after yourself. I get why there was that disdain. To hear about the trash problem in this area is one thing, to experience it is an experience all in itself. While Alice lake is a show stopper and I have unfinished business with that loop that taunts me, I probably would of gone somewhere else. Too many people and too much trash. Sending all my love Sawtooths! Hopefully people see what they have and start giving you the love you deserve.

Backpacking Emerald Lake via Aspen Grove with a summit of Mount Timpanogos.

It’s become a yearly tradition to take my child to the timpy top of the summit of Mount Timpanogos. But what better way to build upon the tradition than to turn it into a backpacking trip? I will admit that the first time I day hiked Aspen Grove I had seen a group of backpackers coming down and had the thought that there was no way I’d ever carry a heavy bag up this trail. I’ve now done it twice. With child in tow. I wouldn’t consider this child friendly unless your child is used to hiking high mileage. At the end of the post I’ll talk about what route local to the Wasatch is the perfect route to train up your kidlet for the climb to Emerald lake.

Summit of Mt Timpanogos

Timpanogos is the second highest peak in the Wasatch Range and is a rite of passage for local peak baggers. She rises 11,752 feet above sea level and commands your attention with her show stopping beauty. She is one of the most recognizable mountains of the Wasatch and is a heavily trafficked trail. I currently am employed as a SAHM which means I can go during the week when the crowds are more manageable. I never go on a weekend. Weekend traffic has become such a problem up the AF canyon side that they are now implementing permits. Aspen Grove side is located just after Sundance in Provo Canyon. While it doesn’t require permits there is a fee. Last year it was $6 or free if you have a National Park Pass. AF Canyon has the same fee requirement in addition to a permit. Rangers check both these lots multiple times a day. You will get ticketed if you don’t pay the fee.

Looking down on Emerald Lake from the Summit

Let’s talk about Emerald Lake real quick. Emerald lake isn’t so Emerald. The name really hypes it up. Don’t get me wrong, this is a beautiful lake, but compared to others in the Wasatch I’m just going to be a spoiled brat and say meh. Now it’s the views you get from the scenery around Emerald Lake that make this trip worth going. Emerald Lake is just the water source. It also attracts the local herds of mountain goats. The goats tend to gravitate to this area. The lake isn’t watershed like a lot of high alpine lakes in the Wasatch Range. You can’t swim in watershed. It comes with a huge fine. But, since it’s not watershed you’re welcome to take a dip. Dogs are also allowed on this trail since it’s not in a watershed area. Just make sure your dog doesn’t like to chase animals. Dogs have been gored by approaching the goats too closely.

Goats at Emerald Lake

There are two trails you can take to Timpanogos. Well, two that don’t require off route navigation , scrambling and danger. Which can be a lot of fun for the experienced wrangler, but not for kids or backpacking. You could take either the Timpooneke trail or Aspen Grove to Emerald Lake. Timpooneke is going to be a much longer haul and it doesn’t have any water sources after mile 1.5. I like backpacking on trails that have abundant water sources. It allows me to cut a massive amount of weight from my pack. I usually leave my bladder at home and carry a Katadyn Be Free 1L soft flask filter or the thru hikers classic the Sawyer squeeze paired w a smartwater bottle. Since there are multiple water sources along Aspen Grove I highly recommend this be the route to Emerald Lake. The trail from Aspen climbs over five miles to the lake. Sounds easy right? Add in a whopping 3,300 feet of climbing with little to no shade and those six miles hit a little different. Last time my watch tracked 5.78 miles with 3,313 vertical gain. It took myself and my 4 year old 6 hours and 46 minutes to complete. There were two 30 minute breaks in there as well. Now let’s talk about the trail.

Campsite Near Emerald Lake in the Dark

The trail starts off from the same parking lot as Stewart Falls. Make sure you’re paying attention to signage. Better yet if you’re not familiar w the area download the gpx file to Gaia to help keep you on the right trail. The lame horse trail split also has confused people. Lame Horse is located before the first waterfall. The path to the first falls is just over a mile. You’ll find yourself occasionally walking on a dilapidated paved path. Moose can be spotted regularly along this section of trail. Keep your eyes peeled for them. I usually start this section in the dark. It becomes scorching hot during the day and so I prefer to cover this section in the cool morning air. My kidlet LOVES hiking with his headlamp so it’s a treat for him which helps tremendously with motivation and attitude.

Passing second of the Falls

The first two falls are beautiful. The second one especially. I love cooling off here when coming back down the mountain. The water always feels subterranean even in the heat of a summers day. After these falls it gets steep for a minute before doing some long exaggerated switchbacks. The switchbacks are gentle as they lead you to the mid portion of Primrose Cirque. The views are incredible. The path is decently wide, but there will be large drop offs to one side most of the way to the lower basin from here. I usually hike side by side w my child and keep him on the inside away from the drop. On steep parts we usually hold hands. This helps give them a little extra boost when climbing. I only hike with one pole while backpacking with my child. I used to laugh at people who used poles, but they are great when climbing and it acts as my staff of stability when descending. Especially when holding a hand that’s connected to someone who can’t quite grasp a steady, calculated descent. The pole also helps keep me upright so my body can continue to get the most oxygen possible.

Towards the End of the First Switchbacks

After the long switchbacks you’ll encounter the talus crossing. I’d say this is a little over halfway with the hardest part to come. The talus field crosses under cliff bands that tend to break off on the regular. You can usually hear small pieces here and there. While it’s not steep on this short section, the trail is a little more narrow. I make haste through this area. I have PTSD from a cliff band releasing and showering down baseball sized rocks. So, I am extra sketched out here. If rocks were to break (you can hear the cracking before the release) the best thing to do depending on the size of the release is to duck and cover your head. I would duck and cover over my child. My backpack would help deflect smaller debris. Sorry, not to make you paranoid. Just wanting to give a heads up.

Crossing the Talus

It took about 3 hours to reach the end of the talus crossing. This is where we took our first break. Which the kidlet shamed me for. They say if carrying a lot of weight you should take a ten minute pack break for every 50 minutes hiked. Even though my pack was around 40 pounds I could definitely feel it on my back. So, we refueled with some actual food. I don’t let my kid have candy at home, but hiking I give him a sandwich bag of candy that he rations out. When backpacking sugar can come in clutch. It’s excellent fuel. That’s why it lines the aid stations at ultra marathons. It also helps you come out of a bonk fairly quickly. My child is constantly popping a piece of candy in his mouth as we climb. This helps prevent against bonking. When hiking with young kids on hard tracks you’re basically their pacer. You make sure they’re fueling and hydrated and you mental ninja them by talking about bugs and dinosaurs. I’ve had more conversations about TRex than I’ve cared to.

From here you’re going to switchback to the lower basin. It looks really close. It’s not. It’s deceiving. If you don’t beat the heat you can always stop at a water source, remove your hat and shirt, dip them in the water, wring them out and put them back on. Instant relief. There isn’t shade on Primose once the sun hits this area around the 10 am hour in the summer months. It’s also steeper. It helps that when this area is in bloom there are plenty of vibrant flowers to take your mind off the climb.

Our favorite Place to Break in lower Basin

Once you hit the lower basin it starts getting easier and the views are captivating. It has a Glacier National Park feel to it. I like to take our second break at the grove of dead trees that is found parallel to the trail. The kidlet usually needs a mental break at this point. If you notice your child tripping up a lot it’s usually time for a break. The upper basin usually has milder temps and a breeze going through it. Congratulations, the hardest part is behind you.

Basin

You will gently ascend to the upper basin. You’ll see a large yellow shack in the distance and if you look up at the towering stone walls you might be able to make out the summit shack. During peak wildflower flower season I used to see a dazzling array of colors, but recently I feel the flowers are slowly disappearing. This happens when people pick them or trample through them for pictures. I suspect the goats appetite has something to do with it too.

Yellow Shack

There is one last steep climb to the lake. It lasts all of two minutes. There are plenty of campsites to the East of the lake. Please follow LNT principles and camp at least 200 feet from a water source. I sometimes see people set up right by the lake. They don’t stay there very long. I imagine us locals have something to do with this. There are a few really great spots just past the lake that offer privacy from other hikers and can accommodate large groups. There are even spots in the tree line. Just be aware that the goats like to retire in the tree line in the evenings and they are not shy about crashing your party. They can be pretty forward. They will follow you around and they will lick your backpack any chance they get.

Our Campsite

Usually the next morning we begin an early ascent of Timpanogos. The summit is just under two miles with a 1,500 vertical climb. It’s pretty gentle for the majority, but when it’s not it’s not. There are two spots where you’ll gain most the elevation quickly. The crowds usually arrive at the saddle by 9 am. I like to get to the saddle around 6 am and watch the sun rise as I enjoy breakfast. After that I head to the top and enjoy the summit without a large crowd. It does get pretty crowded at the summit. Especially on weekends. It’s common to have around or above 400 hikers summit in a day on the weekends.

Saddle of Timpanogos at Sunrise

From Emerald Lake to the saddle you’re going to traverse a large talus field strewn w wobbly ankle breaking rocks. While it’s not steep it will slow you down. I managed to traverse it in the dark with my child just fine. The trail is pretty well defined and there are multiple cairn stones to look out for. It’s what comes immediately after the talus field that I loathe. You climb a short steep path that is loose dirt to connect with the Timpooneke trail right before the saddle. I highly recommend poles for the descent unless you want to butt scoot down. It’s that steep and chossy. This was the most challenging part of the trail w my child. On the way back we played a freeze game. We held hands and I would have him stand as still as possible until I got my next foot hold and then he would unfreeze. You’re not going to die if you fall down this, but it would make for a pretty garbage fire day.

Traversing the Talus Field

The saddle is a large area. Plenty of room for big crowds. You can see the trail from saddle to summit. It looks really narrow, but it’s not. When going with kids I suggest waiting for any large groups to pass. If any hiker needs to pass us we just both lean up against the side. The trail from saddle to summit has some jaw dropping drop offs. It’s dizzying to look down. If you’re afraid of heights I’d turn around at the Saddle. From the saddle you can see into the basin on the Timpooneke side and you’ll have an amazing cityscape of Utah County and Utah Lake.

Saddle of Timpanogos

Once you leave the saddle you’ll be hiking on the opposite side of the mountain. The chimney is the spot that usually throws most people off when traversing saddle to summit. For those of us who have summited many times it’s easy for us to spot the switchbacks, but first timers can get off track. If you are scrambling you’re off course. I would probably link up behind a group and watch where they go. This portion is easy to miss.

Chimney Portion w my friend Jill and Janice. Jill carrying her daughter Katie.

After the Chimney you’ll hit Deception Pass. I don’t know if this is a real name for it, but it fits. You’ll see the summit in the distance and it looks a lot further than it is. It’s also coupled w a steep climb. There are multiple trails to the summit. You can go straight up a ridge or switchback. Either way is manageable unless you’re afraid of heights. Don’t ever push yourself beyond your abilities. The mountain will always be there. If you continue just take your time. Stop. Get your camera out and take some pictures. Don’t take photos as you’re walking this section. This section however photographs spectacularly.

The Final Climb

Once you reach the top you’ll be rewarded with 360 degree views. There is a huge shack that is as iconic as it is an eyesore. The summit register is in the shack. Prayer flags are hung from this structure and it can make an excellent wind break on a blustery day.

Enjoying the Summit

We reached camp around noon. We spent the rest of the day relaxing and exploring around the Emerald Lake area. You could also bag Roberts horn that is next to Emerald Lake (NOT kid friendly). We chose to stay a second night to break the trip up and make it more digestible for the kidlet. I do like to have time to relax and play when backpacking with my child. It is morale building for them to do so. I love having a picnic at Emerald Lake and watching the herds of goats.

Goats of Timpanogos

I was asked several times where my carrier was for my child. They blinked in disbelief when I told them he did all the miles on his own two legs. While this is a manageable trip for a fit adult it’s not exactly child friendly. How did I feel confident enough to do this twice? I take my child to the mountains regularly. We also run, bike and do other endurance based activities. I built his mileage up little by little as not to overwhelm him. I always have a reward of some kind for a job well done. The best hike in the Wasatch to gauge their fitness to climb to Emerald Lake is Hidden Peak from the parking lot of the Snowbird Ski Resort. If you hike to the top you can ride the tram down for free. Kids love trams. This is his favorite hike. It’s around a 3,100 foot vertical climb in the space of 5 miles via Peruvian Gulch. My son can climb this in 2 hours and 46 minutes. Aspen Grove will take longer due to the trail. After we climb to Hidden Peak and ride the tram down we get an ice cream. We do this multiple times a summer. It helps keep him legged up and he’s always excited to hike to the tram. Another thing that helps with this trail is you reach around 11k feet. Great to test how altitude can make a difference or not when hiking. Happy Trails everyone. Timpanogos is a very sacred place to our local Wasatch community. Please leave it better than you found it. Hope you enjoy this trip as much as we do.

Top of Hidden Peak

Backpacking Zion West Rim Trail From Lava Point to Grotto.

This trail has been on my bucket list for years. It is a permitted trip which slashes crowd size, but permits go fast. On the 5th at 10 am of each month Zion releases their permits for the following month. West Rim gets snatched up in minutes. You have to know which site you want and start the reservation process the second the clock strikes 10. I got permits for Memorial Day weekend. I was worried it would be too hot, but it was perfect. The rim sits over 3k feet higher in elevation than the canyon floor. Making the temps wildly vary between the two. While it can be baking hot on the canyon floor it was mild on the rim.

You can start the trail from the Grotto TH and do an out and back or a point to point starting from Lava Point and ending at the Grotto which is the same TH as Angels Landing. The drive to Lava Point is a long drive from the visitors center that requires a high clearance vehicle. There are companies you can pay to shuttle you from the visitor center to Lava Point. This is a great option. The only bad thing about our trip was having to shuttle back to retrieve the car we left at Lava when we were tired and just wanted to go home. Otherwise we were treated to a portion of Zion that is tucked away from the overwhelming crowds and where solitude and the world class views of the mars like landscape are abundant.

Sunset on the Rim

The trail is well maintained and the entire way is marked well at each trail split. Starting out it’s a nice gentle walk through the pines. It continues like this for a few miles. You don’t start to have any noticeable elevation change until you descend into Potato Hollow. The area is pretty, but nothing to write home about. Even though you are on a mesa the quintessential West Rim views you’re looking for don’t appear until after you’ve climbed out of Potato Hollow. I’ve preferred this areas aesthetic in the Spring vs Fall. Every fall picture I’ve seen of West Rim was a brown and yellow color palate vs the lush green we were treated to. The only thing to remember is that the road to Lava is seasonal. Depending on the snow it is sometimes closed until late May. You can still get permits in the earlier months. This just means you don’t have the option of a point to point. Point to point is an easier journey.

After walking through the pines for a few miles you’ll do an easy descent into Potato Hollow. It’s grassy and does have a seasonal seep coming out of the ground near one of the campsites. The deep is usually dry by late spring. It was still seeping when we went, but I’d never count on this as a water source. We stopped and took a break in Potato Hollow before the climb out. The climb out isn’t steep. You’ll do several short climbs before the canyons below come into view.

Almost done w the Climbs

Once you get up on the rim there should be a trail split. Go right to access the campsites. The views from here on out will cause you to take pause and the trail will be a mostly flat scenic gold mine. Full disclosure… the views were much better than expected and I HAD expectations. The cacti were blossoming, the flowers were peaking and the birds eye view into the canyons below were fabulous.

Views from the Rim

We reserved campsite 4 for our group of 10. The plus side is you have the rim on both sides of you and killer views for sunset and sunrise. I tracked 9.07 miles from Lava to site 4 with 1,039 feet of climbing and an 1,181 foot descent. It took us with a 4 year old 6 hours and 35 minutes to cover these miles. This includes two breaks and one very epic meltdown involving the length of sleeves one must wear when its hot. Another tid bit about the campsites is I personally wouldn’t want to stay at any of the sights before 5 unless I was doing a longer haul from Laverkin Creek. They are so far away from all the great views West Rim has to offer.

Campsite 4

A few things about backpacking West Rim. You can’t dig a hole and poop. You are required to bring a wag bag which they sell at the visitor center if you forgot one. You must pack everything out that you pack in which should be happening on every trip. There are also no fires allowed. The nearest water source is 1.5 miles away from campsite 4. You must either carry all your water in or draw straws to see which unlucky friends get to make a 3 mile trip to fetch water. Cabin Spring is a small trickle. Be aware that it will take you a hot minute to filter so give yourself plenty of time.

Cabin Spring

The next morning my sister and I woke up early and watched the sunrise while everyone else was still sleeping. This was a highlight. I’m an early bird, but do require an hour to slink around get moving. Watching the sun spill over the mountains in the distance while I drank my coffee got the day off to a great start.

Sunrise from the Trail
Desert in Bloom

We all started the hike out at 7:30 am. It was chilly in the morning, but this was going to help us beat the heat. You hit a wall of heat coming down the canyon. I know you’re descending most of the time, but even then that wall of heat hits hard. We wanted to clear as many miles as we could before this happened. We were shooting for a 12 o’clock arrival at the TH.

Views starting down into the Canyon

Shortly after passing Cabin Springs you begin your hike down the slick rock path carved from the side of the mountain. If your knees are sensitive to descents I highly suggest bringing a knee brace. Walking over rock and pavement tear up your body vs walking a soft dirt path. From here on out you’ll be walking on slick rock for the remainder of the trail until you hit the paved switchbacks of Walters Wiggles.

Sister on lower Portion

Once you descend for a bit you’ll hit some trees and shrubs. It felt refreshing to hike through this section of trail. The sun heats up the slick rock quick and then the rock radiates that heat back up at you. We were racing the sun. Luckily up until after the the oasis we were in the shade.

This is where you’re going to start seeing day hikers. There are a decent amount of people before the final climb, but you won’t hit the Disneyland crowds until Scouts Lookout. The views before the descent to Scouts are money. I was just blown away by how gorgeous this hike was.

Above Scouts Landing

Once we hit the saddle to Angels I was done. The crowds are insane! I’ve hiked Angels twice and maybe passed one or two other groups. Now it’s like a line to the Peter Pan ride at Disney. The crowds got a little more varied. You have several trail DJs and be prepared for people to loudly mock you about how big your “hiking” bag is. Lol. Most people don’t realize there is a whole other world past Scouts Lookout. I was once one of those people. Younger 2011 Jenny would of made fun of 2021 Jenny’s bag too. Just not loudly.

Final Descent to Scouts Landing

The rest of the hike is pretty cringy. You have the oppressive heat. The only relief being the brief stint through the corridor of Refridgerator Canyon. Before Refrigerator Canyon you’ll descend Walters Wiggles which is hands down the steepest portion of the entire West Rim trail. After that my child just complained he was hot and we had to find every shade opportunity possible to give him reprieve. It was that hot. Even in May. I pitied all the souls making the climb to Angels in the mid day sun. After you make it to the TH you’ll just catch the next shuttle back to the visitors center. I’d also recommend grabbing your next meal at Oscars Cafe before you head out. I dream about Oscars breakfast. Their burgers and sweet potato fries are worthy of a required stop too. We always eat here whenever we visit Zion.

Backpacking Liberty Lake in the Ruby Mountain Range.

The Ruby Mountain Range is pretty obscure. It’s located near Elko Nevada. I found this trail by a twist of fate. Twist of fate was me needing to squeeze every bit of goodness out of backpacking season and the Ruby range was the only place within a 4 hour proximity that wasn’t going to be pouring. I packed up myself and the 4 year olds gear as my Husband side eyed me in disbelief that I had managed to find an adventure to be had this late in the season. Best of all it’s not permitted.

Liberty Lake

The drive to the trailhead was on a paved road through Lamoille Canyon. You don’t need a high clearance vehicle to reach the trailhead. Since it’s so far out there from any major city you won’t find yourself fighting for parking. You will see people on trail. Which I was a bit suprised given the location. We backpacked this trail mid October. The colors were peaking and the temps were comfortable. This is a desert so hiking in the summer could be brutal. I feel this is route is best suited for early summer and late season.

Whoever created this trail did a beautiful job. The grade is pretty gentle, but my perception is probably skewed since I spend most my time in the rugged Wasatch range where vert feels real. It was fall so the lower river crossings that can be a pain and have some makeshift bridges were completely dry.

Top of first switchbacks

The stats to Liberty Lake are as follows. I tracked 4.68 miles to Liberty w 1,484 vertical gain and the final descent from the pass was 445 feet. You do go over a pass after Lamoille Lake. It took my four year old and I 3 hours and 2 minutes to reach Liberty Lake. This included a 30 minute break to photograph Lamoille Lake.

Starting out the trail you climb to your first set of switchbacks. The views are decent, but once you clear the first set of switchbacks the scenery really starts showing off. You can see down into the canyon where you began and the stone rises from the earth forming jagged peaks. You’ll soon after hit dollar lakes. They are a trio of small bodies of water that are more large pond status.

Dollar Lake

After Dollar Lakes it’s a relaxing short walk to Lamoille Lake. Lamoille is the halfway point to Liberty Lake. It’s stunning. It’s a green hued lake that is a glacial tarn that lies at the base of a stone mountain. There are some large capacity camp sites around the lake. I was so enraptured by the unique color of this lake that I contemplated setting up camp here. Lamoille Lake would make an ideal place to take someone backpacking for their first time or to do with small children.

Lamoille Lake

After Lamoille Lake you’ll ascend Liberty Pass. The views from this pass where my absolute favorite views from the entire trip. The switchbacks are a gentle grade. Make sure to look around and really soak in the high alpine desert views.

Looking down on Lamoille lake from halfway up Liberty Pass

The second half of the pass you’ll gently climb through a rocky section of trail. The high point of this pass is an impressive 10,524 feet above sea level. We had spent most of our summer at or above 10k feet so if you’re not acclimated to high altitude you could really be feeling it climbing this pass.

Liberty Pass

Once you reach the top you’ll be treated to views of Liberty Lake. You descend a little over 400 feet to Liberty Lake. There are some great campsites surrounding the lake. I saw four sites, but I wasn’t looking very hard. The smaller one was closer to the water. The other three could fit multiple tents.

Above Liberty Lake

We didn’t venture further than Liberty since we reached the trailhead in the late afternoon. The next day a storm was set to roll in around noon meaning we needed to be hiking back to the car by 9 am. You can descend a short distance to Favre Lake. This lake was recommended to camp at by a local if Liberty was busy. Funny thing was is the only other campers were at Farve. So, we enjoyed having Liberty all to ourselves.

Liberty Lake

Some things to keep in mind. Snow can be found on Liberty Pass in the spring and can make the trek impassible. The water sources are spaced no more than a mile or two from one another until you pass Farve Lake. I was able to just use my Sawyer Squeeze w a Smartwater bottle vs carrying a heavy bladder. The trail is well marked and straight forward. I do make a habit of downloading my routes into Gaia before I go on a trip in case the route becomes unclear at any point. I don’t know about whether or not breakins are common when leaving your car overnight. I just made sure to not leave anything worth stealing in sight. My car looks like my childrens personal dumpster so I’m sure someone would take one peek and hard pass.

Starting up Liberty Pass

While my kidlet can hike big miles easily I usually carry most of our gear. I do have him carry our puffers and raincoats in his pack. Below is our complete list of what I packed for this adventure

Kidlet wearing REI Tarn 18
  • Rei Quarter Dome SL2 Tent
  • Rei Magma 15 Sleeping Bag
  • Big Agnes Little Red 15 Sleeping Bag
  • Nemo Tensor Insulated Short Mummy Pad
  • Nemo Tensor Insulated Mummy Pad
  • Reflectix cut to size to add warmth under sleeping pads.
  • MSR Pocket Rocket
  • Fuel
  • Lighter
  • Kula Cloth
  • Tent Lab Deuce Shovel
  • Wipes
  • Dry sack that is used for trash (please pack out your toilet paper. I put a gallon ziploc bag in my trash bag to put wet items and pooh paper in)
  • Toiletries
  • Headlamps
  • Pillows
  • Food in a dry bag
  • Paracord to rodent hang
  • Two handwarmers
  • 10000 MAH battery charger
  • Garmin Inreach
  • Two Sporks
  • GSR Halulite Kettle
  • GSR Nesting Bowl
  • Puffers
  • Beanies
  • Gloves
  • Socks for nighttime
  • Jammies
  • Rain jackets
  • Stuffed Mountain Goat Beanie
  • Juice Cup
  • Collapsible Mug
  • First Aid Kit
  • Leatherman Squirt
  • Mace

My pack usually weighs about 35 pounds carrying two peoples gear. For backpacking w kids I carry a Gregory Deva 70L for storage capacity. I am not affiliated w any of these brands and paid for everything I own.

This was such a beautiful area. Please pick up after yourself and practice leave no trace principles. Don’t leave the Ruby Range like my kids leave my car.